No art to show yet, son and future dil (daughter-in-law) are in the throes of moving furniture into our house for their extended stay....well, maybe 6-12 months anyway. Planning on spending the day in the studio tomorrow to get started on my book cover for the ATC Technique Book #3 so maybe after that I'll have something interesting to look at here....possibly.....
Anyway, thought I'd better post the winner of the Twinkling H2O Altered Postcard from the previous post.......congratulations to Judy SheaRT from Massachusetts who was #10 as drawn by random.org. Now all I need from you Judy is your snail mail addy and I'll get it posted to you asap.
As a foot-note....my son proposed to Elice on Christmas morning at breakfast amongst the rellies which caused tears to flow but a "yes" followed. So the engagement is set for "Lover's Day", February 14th and a possible October wedding. Of course, I'll be doing the invitations for both the engagement and wedding but there won't be a flower in sight! Sadly, no skulls or anything to do with my usual macabre tastes, nor anything else that my 2 grown son's find weird about me....I'm sure they'd prefer hair rollers and a house-dress! Sorry boys, not going to happen! lol
Enjoy New Year's everyone and here's to a fabulous and arty 2010!

Tuesday, December 29, 2009
Tuesday, December 15, 2009
Another Giveaway & More Inkjet Transfers

The postcard above started out as a blank watercolour postcard which I then stamped using Cherry Pie stamps and coloured with Twinkling H2O's (it was made for a swap with 3 girls from a yahoo group that I'm on). I knew I wanted to do another giveaway before Christmas so I made an extra for this purpose. So if you want this, leave a comment at the end of this post (remembering to include your email please) and I'll do the draw on Christmas Eve. It is true postcard size, 14-1/2cm x 10cm (or 5-3/4" x 4") but it will be mounted onto another piece of watercolour paper so it'll end up slightly larger than that. Just leave me a comment on this post to be in the draw. ;-)
Now, a few more inkjet transfers using the Dataline Inkjet Transparency...
"Throb"...(the delectable Ville Valo from my #1 favourite band - HIM. He's also wearing a little shrink plastic heart, a real heart rather than the usual love-heart shape...so guess you could say "heart-throb")
 "Family Tree"...
"Pensive"... (the girls in my classes love their Johnny Depp pics!!!)

The inkjet transfer class is my last for this year, in mid January I'll be starting book #3 with a Mouldy cover! As I work on this project over the break I'll be posting pics of how it's going.
On a personal note, my son who's done his 6 years in the airforce now, comes home this weekend to stay....with a girlfriend (soon to be a fiance!) and a dog in tow. They'll be living with us for a while as they get their feet under them, find jobs and somewhere else to live. So as my youngest son gets ready to move out of home for the first time, we lose one son, gain another back with extra's!!! Should make for a very festive Christmas season. I am looking forward to it, believe me....please!!! lol All banter aside, family IS what it's all about (not the hokey pokey!), remember to be extra nice to those closest to you at this stressful time of year and remember....patience and a smile plastered to your face will get you through most situations.
Friday, December 11, 2009
Inkjet Transfer Class
Aaaahhhh...so we come to Inkjet Transfers, or should that be "aaarrrggghhhhh.... inkjet transfers"!!! The inkjet transfer technique can probably be described as one of the most bothersome of just about all of the various papercraft techniques. Some people persevere and push through that pain barrier and actually end up enjoying this technique...others, well they give up after a couple of attempts and say it's not for them. I'm a "push through" type of person though I must say it helps if the first few times you do them they turn out okay! lol
So in this class we'll be using Dataline Inkjet Transfers and either Isocol rubbing alcohol or Matisse Matte Gel Medium as our transfer method. They both work, with different end results and feel. For years I used the Apollo Transparency, but as that is becoming rarer than hen's teeth, I've searched for another alternative and Dataline is it! It's a UK product (good news for those Brits!) and is available at Scraptivate by the sheet.
Before showing you this first picture, I have to admit that I'm such a total Adam Lambert whore (in a nice way of course!). I have his new album - For Your Entertainment, and it's such a great cd to listen to in the car, volume cranked up and singing at the top of your lungs. Of course, only do this if you're the ONLY one in the car. Husband's do not like 50+ women (especially their wives), squirming in the seat while belting out the words to an S & M song by a singer who obviously does not swing "their wive's way"....frankly, he just doesn't get the attraction. One hot boy!!! (That was only one song....don't judge him 'til you hear the rest of the album!) Now you all know WAY too much about my predilections....here's the atc.
"Sticks & stones"...

"Human Salvation"...

"Awaken"...

"Pain and Pleasure"...

More inkjet transfers to come, only managed to get these 4 completed today, have another few in the works. All these Christmas lunches are getting in the way of my art time!
Friday, December 4, 2009
Smoosh & Magic Stamp atc's & Quotes For Sale
The last class for the Smoosh & Magic Stamp technique was held yesterday and I was surprised again at how many of the girls hadn't done the smoosh technique before! It's right up there with credit card technique for creating unique and beautifully coloured backgrounds for all your papercrafting needs. If you check out Tim's on-going 12 tags of Christmas on his blog, his very first one of a couple of days ago had his smoosh technique. Tim's mind must work in overdrive with all these techniques he comes up with....very inspiring! The instructions for doing the magic stamp method is a couple of posts ago, or here if you can't be bothered scrolling down. ;-)
"Art"... (Danielle, this is the "terrible" background that you did and threw in the bin, did I not say I would resurrect it for you! See...there's nothing wrong with it that the right coloured picture couldn't fix. As they say, one person's trash is another person's "must-have"! lol)

"Temptation"... (The German Scrap scrollwork embellishment - available at Scraptivate - comes in several colours. I used the Iridescent White and then coloured it with the same colours of Distress Inks I used for the background for this atc - Faded Jeans and Pine Needles. I simply used a sponge and applied the colour direct to the scroll....it still retains a shimmery iridescent effect though it's coloured perfectly to match the background.)
 "Organic"... (The ripply stuff down the bottom is wave board that we sell at Scraptivate too! Gorgeous stuff that comes in white so you can colour it how you want - though I'd recommend against using Glimmer Mist - it separates the top layer of wave board from the bottom flat piece but I did manage to resurrect it enough to use the wavy bit. Better to either paint or ink it. There's also some stitching in silver metallic thread on this one - to represent seaweed...I think?)

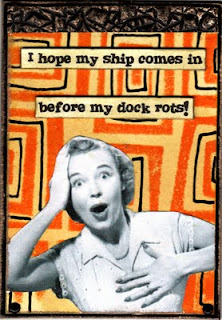
"I Hope"... (Just love retro pictures and they suit my plethora of snappy quotes that I have just perfectly!)
Speaking of quotes, I have 13 A4 pages of printed quotes to use on atc's for sale. I've sold these for quite a while but have never mentioned it here...never got around to it. Postage for all 13 sheets within Australia is $1.10 and the sheets are $1 each, so a total of $14.10 for about 260 quotes. They are printed on satin-smooth 100gsm paper. Be warned, there is some quite risque quotes in there but each sheet has a mixture of deep and meaningful as well as the more "questionable in taste" ones. If you have been following my blog for a while, you'll have seen my sense of humour and if it speaks to you, then you'll love the quote sheets! lol You can email me at the link up the top right and yes, you can direct deposit or paypal me. I also post overseas though the postage is a little higher.
"Art"... (Danielle, this is the "terrible" background that you did and threw in the bin, did I not say I would resurrect it for you! See...there's nothing wrong with it that the right coloured picture couldn't fix. As they say, one person's trash is another person's "must-have"! lol)

"Temptation"... (The German Scrap scrollwork embellishment - available at Scraptivate - comes in several colours. I used the Iridescent White and then coloured it with the same colours of Distress Inks I used for the background for this atc - Faded Jeans and Pine Needles. I simply used a sponge and applied the colour direct to the scroll....it still retains a shimmery iridescent effect though it's coloured perfectly to match the background.)
 "Organic"... (The ripply stuff down the bottom is wave board that we sell at Scraptivate too! Gorgeous stuff that comes in white so you can colour it how you want - though I'd recommend against using Glimmer Mist - it separates the top layer of wave board from the bottom flat piece but I did manage to resurrect it enough to use the wavy bit. Better to either paint or ink it. There's also some stitching in silver metallic thread on this one - to represent seaweed...I think?)
"I Hope"... (Just love retro pictures and they suit my plethora of snappy quotes that I have just perfectly!)

Speaking of quotes, I have 13 A4 pages of printed quotes to use on atc's for sale. I've sold these for quite a while but have never mentioned it here...never got around to it. Postage for all 13 sheets within Australia is $1.10 and the sheets are $1 each, so a total of $14.10 for about 260 quotes. They are printed on satin-smooth 100gsm paper. Be warned, there is some quite risque quotes in there but each sheet has a mixture of deep and meaningful as well as the more "questionable in taste" ones. If you have been following my blog for a while, you'll have seen my sense of humour and if it speaks to you, then you'll love the quote sheets! lol You can email me at the link up the top right and yes, you can direct deposit or paypal me. I also post overseas though the postage is a little higher.
Inkjet transfer class is coming up next, the final class for this year.
Thursday, November 26, 2009
More Magic Stamp atc's....
Here's some more that I've done... see previous post for description of how to do it.
"She was"... (Another retro one)

Two that are similar, one is for my technique book, the other is one of the raffle atc's for my classes.
"A good wife"...


More to follow...

"Past"... (I didn't crop this one as much as I normally do when I scanned it so you can see the gauze hanging off the edges of the atc. I coloured the gauze with Suede Glimmer Mist).

More to follow...
Wednesday, November 25, 2009
Magic Stamp Revealed!
The technique that was mentioned in the previous post, Smoosh & Magic Stamp, is the upcoming atc technique class at Scraptivate. There were some good guesses as to what it actually was but Gaby was the one who guessed correctly! I used a foam stamp, sometimes called a Magic Stamp, or Make-a-stamp, or simply a Foam Stamping Block.
You heat the block up with a heat gun, then quickly impress it into something. For my class I'll be using the Cuttlebug Embossing Folders to make the impressions in the stamp. These work wonderfully as you can impress into either side, for more ink or less depending on which side you use. The base underneath the magic stamp is paper that's had the smoosh treatment.....a bone fide Tim Holtz word! Distress Pads swiped onto a craft mat, spritzed with water, then paper pressed onto it and twisted and lifted to reveal a beautiful swirl of colours.
So here's a couple of retro Magic Stamp atc's.
"I'm Creative"...

"I don't cook"...

More to come.....
Thursday, November 19, 2009
Peeled Paper and Magic Stamp Peek (& Giveaway)
I have my final Peeled Paper technique atc class this morning at Scraptivate and if the previous 3 classes are any indication, the girls are going to have some "oh no!" moments that will turn into "oh...yes!!!". lol Some techniques are like that, you think it's all turned to cr*p, and then finally it just comes together and looks fantastic.
"What we see"... (The bamboo stamp is by Hero Arts. This atc is for the WTA - Winner Takes All, sort of like a lottery - that's held each month on the Paperarts Yahoo Group)

"Pilot Light"... (I can't remember who the flourish stamp in the background is by, it's not very clear anyway so guess it's a moot point! This is the raffle atc for this mornings class)

My next technique class is called Smoosh & Magic Stamp! This has had a few of the girls stumped and I've told them I'm not going to tell them what the magic stamp is until the class. The smoosh technique is Tim's one of using Distress Inks direct to craft sheet, spritzing with water, laying down a piece of paper, twisting then lifting to reveal a beautifully coloured piece of background paper. The colours in the atc below in the background are Scattered Straw and Vintage Photo. The magic stamp bit is the stamped background....for that info, you'll have to wait until after the classes! But I will come back in around a week or so with some more samples.
Just for fun, if anyone can guess what I've done to make the background, leave a comment and the first person who guesses correctly will get some atc's from me, including a magic stamp one! Remember to leave your email addy please. (No cheating from any of my girls who know already what it is!!! hahahahaha)
 By the way, see the lovely German Scrap on the bottom of this card above? It's new from Scraptivate, click here to see more new ones - click on Scraptivate German Scrap in the left hand column, then New Nov '09. This one started out white and I painted it with Burnt Umber Light to alter it to suit the atc.
Thursday, November 12, 2009
Peeled Paper Background atc's
I have just three samples so far for the Peeled Paper Background Technique, more to come after Friday. This is a technique that comes from the talented Claudine Hellmuth. I have all three of her books as well as her video's and even though her style may be different than mine (or should I say, MY style is different than hers!), I can still absorb her wonderful techniques and apply them to my own work. I think this is something that some people tend to forget, even though you may not like a particular "thing", be it a card, an atc or even a scrapbook page, there may be some technique included in it that could be adapted to your own particular style. You just need to learn to look beyond what you actually see, to see possibilities that you never realised were there. Enough talk....
"Temptation"... (Hero Arts Bamboo stamp embossed with Copper Dreams embossing powder. This is one of my own recipes, 4 parts Copper embossing powder mixed with 1 part copper glitter. Adds a little sparkle in real life! If you want more embossing powder recipes, check out the post here).

"Illusion"... (Wrought iron stamp found here)
 "Work backwards"... (Circular stamp from Non Sequitur, Burning Hearts Plate #56)
 More to come over the weekend. ;-)
Friday, November 6, 2009
Faux Tin Type Finale
A quick post as I'm off in an hour for a weekend down south with hubby for a break....mmmmm.....driving in the beautiful South West of our State, might even get all the way down to Albany! No plans made, no bookings made, just drive and stop where and when we like. This does SO not sound like my husband!!! lol Plan, plan, and if there's extra time...plan some more! But not this time. ;-)
Here's the last 2 Faux Tin Type atc's I made for the last ATC class at Scraptivate, think the girls really loved the look of this technique. Making the frames takes way more time than the actual technique, but it still doesn't photograph or scan any better than before. You'll just have to imagine the reflective quality of the images.
"HIM"... My homage to Ville Valo, lead singer from my favourite band, HIM. The bat stamp is one of Cherry Pie's fabulous stamps! The tree is a clear one that I don't remember the name of. It did have a little girl swinging on a swing, didn't like her so I cut her off the stamp...permanently! hahahaha

"Fashion Plate"...The frame has been run through the Textile Cuttlebug embossing folder, gorgeous folder that one! Pity she looks so bad, this one is going to a friend over East so she at least will know it looks better in the flesh.

That's me, I'm off! Next class is Peeled Paper and just for Tracey...some Christmas images (I'm really going to struggle with this one!). lol
Saturday, October 31, 2009
Faux Tin Type Technique & last of the Dominoes
I'll start off the with the last of the Domino atc's from the previous class.
"Flagrant Desire"...

"Mother Nature"...

The Faux Tin Type technique is trying to replicate the old tin type photo's using modern materials that most paper-crafters have...foil tape, transparency & a xyron machine. They are notoriously difficult to scan or photograph because of the reflective nature of the foil but you'll get the gist of it.
"Illusion"... (yes, I've used the black texture paste to create the border around this)

"Spectral"... (same image but with a cuttlebug frame made from chipboard)

"Liberation"... (another cuttlebug frame but with foil tape over the chipboard, thanks Ness for the great image, though I feel the word "Liberation" should have a question mark at the end of it! lol)

"Hex"...

"Twilight"...(yeah, I know....can't help it though, I've been a vampire fan since I was a kid with all those Bella Lugosi films & the original Nosferatu. Of course I've read Twilight, then went onto the more adult books of Laurell K Hamilton, the Anita Blake series. I've finished the series, 16 books in total and was reading 3 of them a week, just couldn't put them down! (Thanks Mandy for the loan but I've now ordered my own set). Now I have to wait for #17....darn it, I hate that! I do the same thing with Lee Child, he brings out only 1 book a year in April and I buy it and read it in a few days then have to wait another year for the next one.

More to come after I've done some demo's in my classes.

More to come after I've done some demo's in my classes.
If you want to see a REALLY, REALLY, cool haunted house, take a look at my friend Julie's blog here. I think from memory she told me it was around two feet tall and she lists all the Collections chipboard products she's used to make this. Gorgeous!!! I told her I wanted to live in it. lol
Friday, October 16, 2009
Time for some Dominoes!
Dominoes are the focus of my next atc technique class.....and focus is the correct terminology for using dominoes on a small area like an atc. It's generally the first thing that hits you when you look at them in real life as they are so dimensional you can't help but be drawn to it, touch it and hopefully, it will marry itself nicely to what your particular story is in the atc. I'm always saying that the girls in my classes, let your atc's tell a story....it doesn't really matter if you are the only one that understands it, still tell it.
So here's my first domino atc, and it's my favourite one. A sheer heaven transfer (thanks Svetlana for the image!) with the beautiful bamboo stamp silver-embossed over the top and the same silver embossing on the domino.
"Delicate"...

This next one is a background made by spraying a perfect pearl/distress re-inker/water mix over canvas paper and then stamping with white embossing powder. I used my old stand-by, the Hero Arts Vintage Map (discontinued). Also had to include the black texture paste around the edge for a finishing touch!
"Escape"...

This is a close-up of a larger domino that I glued a picture onto, then wrapped with gold thread, then coated with Glossy Accents. A little machine stitching with the same gold thread holds the book paper onto card stock sprayed with the perfect pearls/distress re-inker/water mix again - different colours from before obviously!
"Radiate Life"...

Here's the full size atc...

Next is a simple little atc using glossy card stock coloured with alcohol inks, as well as the same colours of the alcohol inks on the domino that has been stamped with a flourish stamp and a key added with silver thread. The domino comes out a slightly different colour from the background, even though I've used the same colours because the gloss card base is white and the domino is cream.
"Dwelling"...

Finally, black on white with a touch of blue....created with Black Stazon on white gloss card and Twinkling H2O Mystic Blue for the eye-colour. The domino is coloured with some blue sharpie & blending solution with a touch of gold metallic mixative thrown in for good measure....and a stamp.

Finally, black on white with a touch of blue....created with Black Stazon on white gloss card and Twinkling H2O Mystic Blue for the eye-colour. The domino is coloured with some blue sharpie & blending solution with a touch of gold metallic mixative thrown in for good measure....and a stamp.

Friday, October 9, 2009
More Crackle Paint & some Glass Bead Gel!
Continuing from the last post, here are more of the crackle atc's.
"Breathe"... Picket Fence (white) crackle paint with some Weathered Wood Distress Ink rubbed onto it to drop the starkness of the white back a bit. If you enlarge this picture by clicking on it, you'll see I also used Golden Glass Bead Gel over the image. This goes on opaque but when the medium dries, all you can see are the little spheres of glass and it also gives it a wonderfully textural feel! Love it!!!

"Transformation"... The fabulous H.R. Giger images will always work well with Black Soot Distress Crackle!

"Portal"... Scattered Straw Distress Crackle, rubbed with some Peeled Paint Distress Ink and Vintage Photo Distress Ink after the crackle had dried. The little brick stamp in the top right is by Cherry Pie.

"Reliquary"... Gothic silver embossed script in background is from Michelle Ward's Printed Matter rubber plate and the beautiful silver window is from Scraptivate - it's one of the many, MANY, styles of German Scrap that we sell at the store. These window arches also come in black and white. I love the silver as you can wipe paint over it and then wipe it off and it grunges it up nicely! The image has the Helmar Crackle 2 step used on it with Payne's Grey paint added and wiped off after the crackle had dried.

Next up is Dominoes! So over the next few days I'll be slaving away in my studio with these little cream plastic toys, trying to come up with interesting looking atc's! We'll see.....
"Breathe"... Picket Fence (white) crackle paint with some Weathered Wood Distress Ink rubbed onto it to drop the starkness of the white back a bit. If you enlarge this picture by clicking on it, you'll see I also used Golden Glass Bead Gel over the image. This goes on opaque but when the medium dries, all you can see are the little spheres of glass and it also gives it a wonderfully textural feel! Love it!!!

"Transformation"... The fabulous H.R. Giger images will always work well with Black Soot Distress Crackle!
"Portal"... Scattered Straw Distress Crackle, rubbed with some Peeled Paint Distress Ink and Vintage Photo Distress Ink after the crackle had dried. The little brick stamp in the top right is by Cherry Pie.

"Reliquary"... Gothic silver embossed script in background is from Michelle Ward's Printed Matter rubber plate and the beautiful silver window is from Scraptivate - it's one of the many, MANY, styles of German Scrap that we sell at the store. These window arches also come in black and white. I love the silver as you can wipe paint over it and then wipe it off and it grunges it up nicely! The image has the Helmar Crackle 2 step used on it with Payne's Grey paint added and wiped off after the crackle had dried.

Next up is Dominoes! So over the next few days I'll be slaving away in my studio with these little cream plastic toys, trying to come up with interesting looking atc's! We'll see.....
Saturday, October 3, 2009
Crackle Technique & a Canvas
Several years ago I posted about a "poppet" style canvas (a la Claudine Hellmuth style) I had made for a friend's daughter who had lost her Dad to cancer when she was only 4. Her baby sister was born only a couple of weeks after Steve died so she has no memories of her Dad. Little Ava is now 5 so it's time that she had her own canvas with her Dad and her in it. Aisha, her big sister is probably going to be more excited about this when she sees it as it's the same picture of her Dad that I used in her canvas. Here's a link to the previous one for Aisha. These are both 8" x 10" canvases. Not my usual dark & gloomy style but I'm a Gemini and I can chop and change at whim. ;-)

This fortnight's round of classes at Scraptivate is Crackle Technique. We sell several types of crackle including the brand new Rock Candy Distress Crackle. This first atc is the Helmar Crackle which is a 2 step crackle...a base coat, let dry for 20 minutes, then the top coat. As you can see it's a clear crackle so over pictures it's great as you can add some paint when it's dry and wipe it off and the paint settles in the cracks.
"Fragment"...

"Betroth"...this is also using the Helmar Crackle.

Ranger also make the Distress Crackle in 24 colours + some metallic colours.
"Rock and Roll"... (Black Soot Distress Crackle. Yep, yummy Ville Valo, lead singer for HIM....my favourite band!)

"Live it"...also using Distress Crackle in Old Paper colour.

"Angel's Art"... Milled Lavender Distress Crackle.

"Temptation"... Aged Mahogany Distress Crackle.

"Icon"...this is the new Rock Candy Crackle from Ranger. I've put some red paint over the top part of it and used Fired Brick Distress Ink rubbed onto the bottom part. You can see the difference that the paint makes...much more seeps into the cracks. Probably would've been better with a less detailed picture underneath. Live and learn.
"The first rule"... This is the Ranger Crackle Accents. It comes in a bottle like Glossy Accents or Dimensional Magic and goes on the same way... through a small tip that you just squeeze on and spread it around. Very easy!

Guess I'll have some more when I do some samples for the classes over the next week.
Subscribe to:
Posts (Atom)