Friday, June 30, 2017

DISTRESS OXIDE INKS!

I've been a huge fan of the Ranger Distress Ink Pads for years now and was, like most people, excited when the news broke there was to be a new Distress Oxide Ink Pad.   They do react very differently than the normal Distress Ink Pads and are a total stand-alone product that is worth the outlay.  This is my opinion anyway, I know some people have been underwhelmed but I think like any new product you need to play with it several times to realise it's potential.... my biggest gripe at the moment.... only 12 colours available at the moment.   Another 12 are to be released very soon and Tim himself has confirmed they will release all the colours that are in the normal Distress Range.  There are loads of example video's on YouTube so check there for inspiration.

"Time flies"...

"Dark & Twisted"...

"Bee my honey"...

"Anti-social"...

These are some samples without anything on them.  They are 5" high 
x 3.5" wide (or 13cm high x 9cm)


Tuesday, June 13, 2017

TARNISHED FOIL

Probably one of the best purchases you can make in the papercraft/mixed media world is a roll of Silver adhesive foil tape.  Ranger sells the sheets (A4 I think) but I prefer the roll that you can buy and if you get the one that is about 8cm (or 3") wide, it will cover an atc easily with extra to wrap over the edges to keep it neat!  When you combine silver foil with embossing folders, embossing powders and black Stazon ink, the effect is just wonderful!  I like to attach my foil to some card stock first to give it a little body, then emboss with your favourite embossing folder then swipe over some clear embossing ink lightly in areas, emboss with powder (I used gold, copper and some colours that suited my chosen images) and heat.  Allow to cool and add another colour embossing powder to contrast against the first colour, then after cooling again, swipe over some Black Stazon ink from the ink pad and it will pick up the texture from the embossing powders as well as highlight the design from the embossing powder!  Great background for cards too!!!

"Freak"...

"Planet B"...

"Bee little"...

"Black as my soul"...

"Assemblage"...

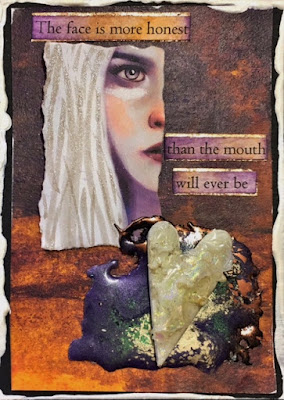
This last one below is my remaining atc from the previous class, Embossed Blobs.

"Honest"...

Friday, June 2, 2017

EMBOSSED BLOBS

First class back from my month long holiday in New Zealand and we'll be working with embossing powders.  I love the fact that there are so many ways to use embossing powders and this is an easy way to add a substantial embellishment piece to your work without detracting from your focal image.  The samples below all have a free-form blog of embossing powder that is made by tipping powder onto a craft sheet and then heating.  I use my Ranger heat gun as it is particularly good at not blowing the powder everywhere but what also helps is if you place a small piece (about 10cm square) of baking paper over the embossing powder before you heat it.  

Another example of how embossing powders can be used is seen in the first example below, "Nature's Graffiti".   The dragonfly is a silver metal embellishment that has been heated and then embossing powder tipped on to it before heating again.  No need to use an embossing ink, the heat from the heat gun is sufficient to get the powder to start to melt and stick to the metal.  I've used black and have added a little gold and a little copper too!

"Nature's Graffiti"...

"Iridescence"...

"Proton"...

"Malevolent"...