Tuesday, December 8, 2020

GESSO OXIDE CHRISTMAS BACKGROUNDS

 This year, as every year, the final class is always a Christmas theme.  During the year I spend time trawling for Christmas images and Christmas quotes to use for this specific class.  The technique for this background is a simple gesso and Distress Oxide ink pad class on watercolour card.  As long as you don't cover all of your card with gesso, you will get varying degrees of colour when applying the Distress Oxide, even when you are just using one colour as the sample below shows.  This first one has only Milled Lavender on it, apart from a smudge around the edge of Black Soot.  Of course, if you spritz with water after inking, you will remove the ink and get back to the white of the gesso so there's lots of room for playing with this background technique.  Yes, I had to include a couple of my more naughty ones, I wouldn't be me if I didn't!  😏
I'll be back early February for Book #25!
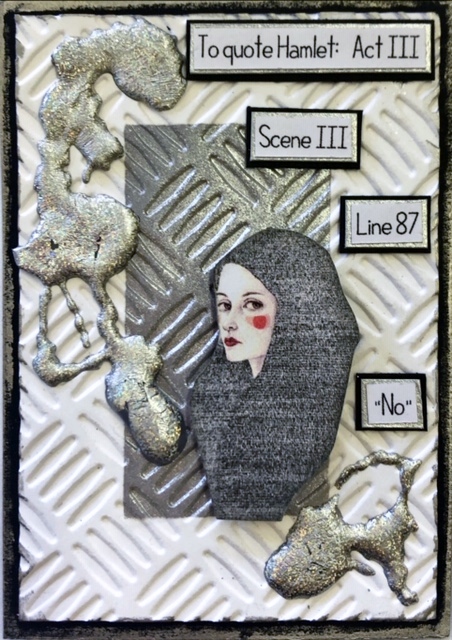
"Dark Christmas"


"BRB"


"Cole"
(The black lumps down the bottom are black
texture paste coal lumps)


"Wine"


"Balls sparkle"


"Fat in August"


Sunday, November 22, 2020

CLOUDY BACKGROUNDS

 A while ago I purchased a cloud stencil as I saw it used to make some gorgeous cards.  Even though atc's are much smaller than your normal greeting card, this technique still translates very well on the reduced size background.  I love both being able to use multiple colours as well as sticking with one colour palette in a couple of shades, and have even done one (not shown here) in just Tumbled Glass, a very soft blue in the Ranger Oxide range of ink pads.  Personally, I prefer using the Oxides to the normal distress ink pads as I think they have a great depth of colour and will blend very easily.  I used Neenah card stock as I know Oxide inks work well with this and for adding the colour, I used one of the handled make-up style brushes with lots of bristles.  Though I also tried it using my round foam blending pads as well as the little finger daubers and they worked well too!  I found it best to work on a glass mat so you can blend off the card to start with and then you are blending onto the stencil so your chosen implement will pick up colour and transfer nicely to the background.

"Artist"


"Memories


"Space bar"


"Escape"


"Voodoo dolls"


"Pinata"
(The brick wall is washi tape)

Wednesday, November 11, 2020

SPECIMEN ATC'S

I have seen various ways of using acetate to make clear cards and in the past have used shrink plastic as a window in an atc so it looks like stained glass when you hold it up to the light.  These atc's are along the same lines in that they are using acetate to make a specimen type of atc that when it is held up, is completely translucent, apart from the image on the acetate.  These are clear floral stickers that work particularly well as they are photographs and look very realistic.  I have still used my black backing for these atc's as I prefer my cards to have a border around them.  This just means you need to cut the same shape/size window for both the front piece and the back black piece.  The front piece starts out as a white piece of card but ends up with various colours of distress inks and distress oxide inks and some embossing on them to match the image.  I've kept these fairly minimalistic with just a little embellishment so as not to detract from the overall look.  
It was a bit of a mission to work out how to attach them in my book.  If I stuck them down on my black pages you would totally lose the effect of the acetate window, but if I stuck them down over white, they still just looked like stickers on a white backing.  So I made some little vellum library pockets and attached those with washi tape so now the little specimen cards can be pulled out to view without hindering the aesthetics of them.  

 "Specimen #1"

"Specimen #2"
(my favourite, as it's a weedy looking thing)

"Specimen #3"

"Specimen #4"

"Specimen #5"

Working out how the pockets would go.


The finished page with 2 pockets and 2 Specimen ATC's.


Tuesday, October 27, 2020

GRAPHITE EMBOSSING

I first saw this technique used on a Facebook group I belong to and was amazed at how it could totally change a dry embossed background.  I used watercolour paper as I needed to be able to add colour after using the graphite paper and found the watercolour paper in conjunction with both Distress Ink Pads and Distress Oxide Ink Pads, worked really well to add that little pop of colour.  The graphite paper needs to be pressed graphite side down towards the paper before running through the embossing folder.  (Ask me how I know this?  Cleaning graphite off your embossing folder is not fun!)  I found by choosing embossing folders that didn't have a lot of flat spaces worked best for me.  Detailed ones work really well with this technique and you can use the graphite on either side (either debossed or embossed) to create two very different looks, depending on how much detail is in your embossing folder on each side.

"2020"

"Wild Side"

"Psychotic"

"Eraser"

"Memories"


"Untie the ribbons"


Tuesday, October 13, 2020

GELLI PLATE MARK MAKING

There are lots of different options for you to make marks on Gelli Plates.  I recently bought myself a set of kids dough rollers, basically a handle with a textured wheel on it.  It's perfect for making patterns on Gelli Plates.  I have also used Cake Scrapers before which are a flat piece of plastic with different edges on them.  The set I bought was 6 different ones with different cut-out edges to create various designs.  As with anything that you press onto a Gelli Plate, you must take care not to press into it as you don't want to cut it or permanently damage it.  Bubble wrap, sticky tape roll inners, plastic lids from bottles, the list is endless of what you can use to make your Gelli Plate pulls more interesting.  

 "Wander"
(A Cake Scraper made the wavy pattern on this one)

"Home"
(This one is a little hard to see.  Down the very bottom,
there are some squiggly white lines.  They are from one of
the dough rollers.)


"Dead of night"
(There are wavy lines on the sky made with one of the 
Cake Scrapers.  I also used a flat edged Scraper to
create the mountains down the bottom before doing
the first pull.  The moon is stamped in Versamark,
then dusted with Perfect Pearls.  You can only
see it if you tilt the card a certain way.  The black
tree is the Deco Black Flock on a die-cut.)

"Isolation"
(These squiggly lines are easier to see and are made
with one of the dough rollers.  I stamped and embossed
the trees on the background with Speckled Egg Embossing Glaze.)


"Now"
(The little dots on the background are from
the spot dough roller.)

"Leave me alone"
(Once again, the squiggly dough roller.
The shiny lines are made by using an embossing
pen and Speckled Egg Embossing Glaze.)


Tuesday, September 29, 2020

FOILED GLUE GUN SHAPES

It's been a while since we've dragged out the glue guns so I thought it was time to do so again, this time for a great little embellishment to add to your backgrounds.  Coloured foils that you can use with two-way glue, double-sided tape, clear embossed stamped images that you then run through a laminator, all of the foils that work with these techniques will work with this one.  Not giving too much away as I want to save it for the class as a surprise as it's surprisingly simple to do, but looks complicated.  Right up my alley.  

"Pinata"

"Nothing"

"Whinese"


"Hamlet"

"Demons"

"Drama shield"

"Dead fish"


Tuesday, September 15, 2020

ALCOHOL INK FLOWERS

Alcohol Inks are such an amazing product and I am continually amazed at how many different styles of art you can do with them.  This technique is using the alcohol inks to create floral effects, yes I'm doing flowers.  Those who know me realise it's a stretch for me to do flowers but these are just so simple to do and look so wonderful, how could I resist?  These are way easier to do on a larger format, say the size of a card (4" x 6") or even an A4 piece.  On an ATC, a single drop of alcohol ink is all you need to create one of these flowers (ATC size is 2½" x 3½").  Using a rubber puffer and a little 91/99% alcohol is how you get the whispy effects.  The metallics are Pinata Brass and Ranger Alloy Foundry.  Black acrylic ink and a white water-based Sharpie marker create all those other little finishing touches.  I have used Kirkland Photo Paper (the back matte side) for my substrate but this works just as well on Yupo.

"Decompose"

"Enchant"

"Ornamental"

"Exotic"


"Cultivate"

"Embracing life"

"Germinate Grow"

"Fragile"

Tuesday, September 1, 2020

STENCIL EMBOSSING

 Stencils can be used with various mediums and this technique is probably one of the simplest ways to add texture to a background.  You can use either a clear embossing ink pad to press through the stencil to get your layer of embossing ink down before embossing with your embossing powders, or, you can use gesso to scrape through your stencil and then add your embossing powder while the gesso is still wet.  You should leave the gesso method to dry a little before heating with a heat gun (don't worry, the embossing powder will just sit there until you're ready to heat it).  If you heat too early, you can get little white explosions coming through your embossing powder.  However, this is a cool look in itself so maybe try it this way to see if it works with you have in mind.

"Social Distancing"


"Insignificant"


"People"

(For this one, I drew along the edge of a city stencil with

a clear embossing pen before embossing to get the

outlines of the buildings)


"Eat glitter"

(The sun rays are glitter embossing powder while the

bird is a JAC paper shape covered with leafing foils)


"Art is an experience"


"Wild side"

(Love this 2-tone spotty embossing powder called 101 Dalmatians)