Tuesday, December 4, 2012

GLIMMER MIST WRINKLE

The last technique for this year is Glimmer Mist Wrinkle. The technique using wet paints, sprays etc and then placing plastic wrap (Glad Wrap or similar) over the top in a wrinkled manner, allowing it all to dry and peeling off to reveal a wrinkled background is a technique that has been around for years in the stamping/craft community. The problem I found is in a 2 hour class, you don't have time to wait for the card to dry and it needs to be dry to get the wrinkled effect as the colour is more concentrated in the wrinkled areas.
So, what does one do..... obviously you can't use a heat gun as the plastic wrap will just shrivel up and that's the end of that! What I did do was placed my pieces of card with the wrap on it while still wet, into the oven. Not too high a temperature and you have to watch out for the fan-forced ones as it wants to blow the wrap around. But in only a couple of minutes, it's dry enough to be able to take the wrap off and your card is dry and the wrinkled area is perfect! 
Below are A5 sized pieces of card using Glimmer Mists and this technique.  Using Glimmer Mists means that you have the shimmer/sparkle from the sprays collecting in all the wrinkles and it looks absolutely wonderful!  I have used some of these as backgrounds for my atc samples below.  An A5 sized piece of card will give you 4 atc backs as it's 5" x 7" in size.


"Voyage of Discovery"...
 
 
"Twirl"...
 
 
"Dramatic"...
 
 
"Just because"...
 

"Soulful"...


Finally, a couple of more samples from the last Metallic Distress Stains Class.
 
"Nymph"...
 
 
"See"...


A Merry Christmas and a safe and Happy New Year to all.... see you in 2013! (unless I get something else done over the holidays which is blogworthy).
Friday, November 23, 2012

Metallic Distress Stains!!!

So this class is all about the new Ranger Metallic Distress Stains.   I know you all love (as I do), the Distress Ink Pads and those who have ventured into the realm of Distress Stains find them indispensable as well.... now with the addition of metallic's to the Distress Stain range, well it opens up a whole new world.   To prove that yes, I can do pink and bling along with the darker style that is more my norm.... I give you "Dream"..... I used the pewter metallic distress stain to stamp onto a distress inked sponged background....gorgeous!!!
 
"Dream"...


This next one I simply swiped some distress stain onto my craft sheet, wiped a piece of white matte card through it, added some Rock Candy Crackle Paint (rock candy is clear), waited for it to dry, then sponged on some Vintage Photo, Gathered Twigs and Walnut Stain Distress Ink.
"Never Regret"...


Finally I did the ol' smoosh method of place, twist and lift of the Distress Stains & Metallic Distress Inks from the craft sheet onto gloss cardstock.  Love how it shimmers on gloss card!
 
"eat it's young"...


Lastly the next two are from my previous class using the slide windows.
 
"Breathe"...
 
 "Mystique"... (this one I covered the slide with textured gold paper!)
 
 
More Metallic distress stain samples to come....

Tuesday, November 6, 2012

Windows - Part Two

This technique uses an old product that I'm sure quite a few of us have hanging around at home, at least if not at your home, then I'm sure you'll find someone who has some lurking in those dusty boxes in a cupboard somewhere.   I'm talking about the old slide frames that came in either cardboard or plastic.  It's as simple as separating the two sides of the slide, removing the negative from inside, sticking the slide back together with a little double-sided tape and then covering with a piece of foil tape that has been embossed beforehand with either a Cuttlebug or Big Shot and your favourite embossing folders.   I have used several things to colour the foil after it's been attached  -  Alcohol Inks, Vintaj Patina Inks as well as plain old acrylic paint!   Attach a picture to the back, mount on a fabulous background and there you have it.... recycling at it's best!
 
"Rock is dead"... 
(love this Spellbinders M-bossabilities brick folder!!!)


"Obscure"...
(Vintaj Patina sponged onto the slide with no embossing used this time) 


"Angelic"...
(Paper Casting background, acrylic paint used to colour the slide)


"I tried to be good"...
(Alcohol Inks used on the slide)


"Go for Baroque"...
This next one below is from a previous class called Clear Embossing & Gilding Wax.  Love the rich look you can get with this technique and this wording just seemed to really suit.... wonder why???


"Men are from Mars"...
This one is from another previous technique called Abstract Acetate.   Might have to stick this one to my fridge so hubby gets the general gist of all things plastic and rectangular!!!   :-)


More to follow...

Tuesday, October 23, 2012

Highlighter Distress Stains

How fantastic that Ranger are introducing their Seasonal 3 pack Distress Ink Pads as individual colours to boost the range of Distress Inks to 48!  I have 3 of the 4 sets, just can't see me using the "Summer" range of brights though... just not me.   Now I can't wait until he extends the Distress Stains to include these same colours, mmmmm..... Iced Spruce in Distress Stains.....heaven!  So this fortnight's teechnique is once again using the Distress Ink Pads as well as highlighter pens.  The highlighters are very bright, fluoro colours but the Distress Stains add that grungey, dirty look to them that tones the colour right down but still gives a great base colour.   I had seen this done in a mag before but wanted to play around with it to see if it could be extended and altered, of course it can - add some clear embossing powder, some water, a bit of book paper and Glossy Accents and it alters the look of it.
 
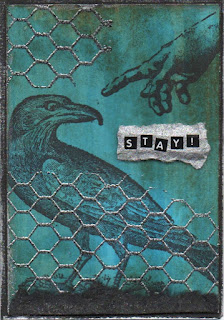
"Stay"...


"Simplify"...


"Freedom"...


"Reflect"...


More samples to follow.

Saturday, October 13, 2012

ATC Windows

Our technique that we're doing this fortnight is ATC Windows.  I've used credit card technique background for one style and cuttlebugged chipboard windows and torn book pages for another style.  Rolling and attaching with embroidery threads just gives them a different look as well as acting as a more secure anchor than just double-sided tape.  Hope you like the samples...
 
"Rapture"...
 
 
Another shot of "Rapture" showing the more 3-d style.  Love the coloured seam-binding too!


"Tie a knot"... (this one has some little beads attached to the thread for extra decoration)


"Chaste" (chipboard frame, cuttlebugged, distress stains and Gilders Paste for glitz)


"Think Chocolate".... (and other things too.....)


More to come.

Sunday, September 23, 2012

White Crayon Resist - New Venue!!!

 My technique classes are on a Saturday morning, Tuesday morning and Tuesday night with the same technique being repeated at these three sessions.  There will be a new technique each fortnight.  A requirements list will be sent out prior to the class... don't worry if you don't have everything, I will supply what you don't have.  Times and dates are just on the right under "Current ATC Classes" and my email address is just above it.   You also receive printed instructions for each technique so you can refer back to them at a later date.
 
The first class will be White Crayon Resist, a great way to use the Distress Inks in all those wonderful colours and your favourite stamps.
 
"Twilight silence"...


"Unique"...


"Emotional Baggage"...


 "Flora"...
 
 
"Gift"... (same as above, just different colours & embellishments)


This next one below is from the previous class - Watercolour Emboss.
 
"Mask"...


Finally, a sneak peek at the next class... "ATC Windows"...
 
"Chaste"...


Sunday, September 9, 2012

Watercolour Emboss

This upcoming atc class will unfortunately be the final atc class run under the Artability banner.   Natalie will still continue to teach her Scrapbook layouts, Card classes and Mixed Media classes at her home and I will be teaching my atc's at my home.   It's been nearly 6 years that I have been teaching for Natalie, firstly at Scraptivate, then through her online store Artability but as things move on and change, one can only go with the flow and adapt to these changes.  Thanks must go to Natalie who gave me a chance all those years ago, taking a risk on an unknown quantity and letting me run with it.  We've both had a wonderful time getting to know some fantastic people and being exposed to all the lovely new products that have come out over the past years.... can I say thank you Tim!!!    :-)
 
 My classes will continue at the same times but with an additional day class being held on a Tuesday.   The times are Saturday's 10am to noon, Tuesday's 10am to noon and Tuesday night 7am to 9pm for those of you who work and can't do a day class.  All classes are run fortnightly and you can check the list at the right hand side of this blog for dates. The classes will be $20 for the 2 hour class which includes access to my supplies if you don't have everything on the requirements list.   I look forward to continuing to teach these little pieces of artwork to the girls who have attended my classes over the past 6 years.   Email me for more details.
 
So this class is called Watercolour Emboss and we'll be using our Cuttlebug or Big Shot machines, embossing folders and those old favourites, Ranger Distress Ink Pads.
 
"Enchant"...


"Fertile"... (yep, another pink one!!!)


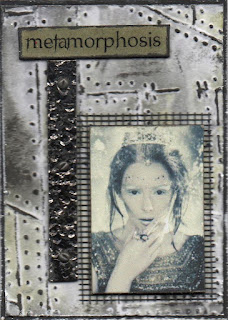
"Metamorphosis"...


"Mythical"...


This next one is from the last Crayon Painting class.
 
"Decompose"...


Finally, this is from the Gesso Crackle class, love these colours!
 
"Fracture"...


Tuesday, August 28, 2012

Crayon Painting

Crayon Painting is the technique for this fortnight's atc class through Artability.  
We'll be using normal wax crayons, think Crayola or similar, and applying them with an iron.  I like to use the Clover Mini Iron but you can also use a small craft iron as long as it has no holes in it.   I love the colours that you can get with the waxy crayons and once it has cooled down, just buff it with a tissue to bring a lovely soft sheen to the surface before adding images etc.   Normal good quality double-sided tape is all I use to stick the embellishments and images down with, no problem with them coming off at all!  
 
You can see from the samples below that it depends on how you use the iron across the surface as to what effect you will get from the crayons.  In the second image I tried to do a landscape sort of scene and added the tree with black texture paste in the tube and rubbed a little silver Gilding Wax on it after it had dried.
 
I have also done 2 new clear sticky word sheets to join the other 5 that I have for sale.  My normal A4 sized quote sheets are still $1 each and I have 18 different ones of those and the clear sticky word sheets are $3 each.  So I now have 7 of the clear sticky word sheets and these have between 90 and 110 words on each.  Email me if you want details or the girls at my atc classes can pick them up from me there. 
 
"Maligned"...


"Depth of life"...


"Disguise"... (love these colours!  Turquoise, brown and silver.)


"Bewitch"... (yes, see I can do pink!!!)


This one below is a sample without any images on it so you can see the sort of effect you can get.  Colours used on this one are red, orange, yellow, black and a little metallic gold.


This one below is a raffle for the monthly draw on the yahoo group - Paperarts.  It's on watercolour paper and coloured with watercolour crayons.
 
"Night"...


Finally a last sample from the technique "Antique Gloss" that I taught
at the last atc class a fortnight ago.  
 
 "Art"...