
I had forgotten how much fun it is to play with glue sticks and silicone molds. BTW, mold is the British/Aussie spelling, mould is the US spelling. I've used both. 😏
I have used both black glue sticks as well as the usual clear glue sticks in the molds. Simply chop some of them up into pieces that will fit comfortably in your mold, then heat with a heat gun until it melts. If your mold has small, detailed areas, you may need to do those little areas first, then drop in some bigger pieces on top. I usually end up with some bubbling but I actually like the imperfection that you get this way. The beauty of using the clear glue is you can paint it whatever base colour you want before you swipe over some metallic wax to pick up the raised areas to show these as a highlight. Of course, you can also put a glue stick in your glue gun and fill a mold that way but I find it cools a little quickly before you get finished. Try it either way, see which you prefer. As long as you use flexible silicone molds, the heat gun won't worry the mold. Even chocolate or soap molds will work! Take care to let the glue shape sit for about 10 minutes to cool completely before you peel it out. I have attached mine using a good quality double-sided tape. Of course, smaller molds will set faster and the more detailed, the more difficult it is to do. But I have been known to use a pin to drag the hot glue into areas where the glue hasn't gone before it sets. Just take care, it's very hot and it will stick to your fingers and keep burning.
Final note: If you paint your clear glue embellishments, you can't hurry along the drying process of the paint as you'll melt the glue embellishment. I thought I'd be clever by adding a little embossing powder to the owl, well, that didn't work out the best as I lost some of the definition on the bottom of the feet. No-one else knows, ok? 😉
"Forecast"
(That's a frozen Hans Solo small chocolate mold I bought on eBay!)

"Tomb"
(This tombstone is a Halloween chocolate mold)

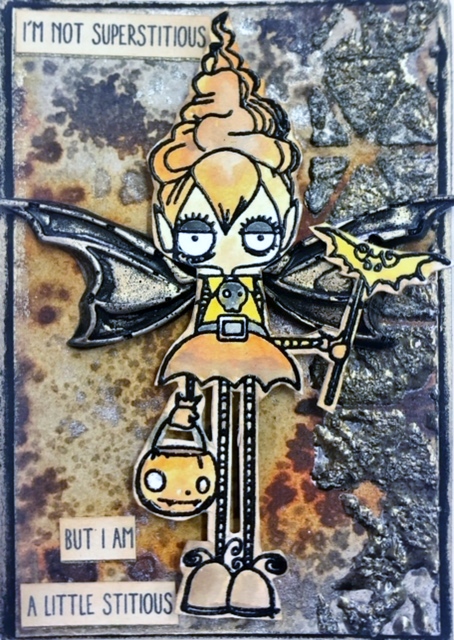
"Superstitious"
(Little bat wing molds)
"Results may vary"
(This mold is a silicone ice cube one)

"Looking for a sword"
(The owl is from a clay silicone mold set)

"Don't look back"
(A small butterfly mold. Yes I know,
not my usual style. 🙄🙄)

Finally, another sample from last week's Gelli Plate & Distress
Oxide Ink class.
"Full of terrors"


