Monday, April 24, 2023

BLACKOUT EMBOSSING

This technique takes advantage of the open areas of an embossing folder by colouring those areas in black, thus leaving the embossed design as the focal point. It is particularly eye-catching if you use vibrant colours as your starting point, I used Distress re-inkers for the initial colouring on the watercolour paper (300gsm). I first saw this technique on Youtube (Sandi MacIver) but skipped the step of spritzing with a shimmer spray as I felt it wasn't really necessary when the addition of metallic waxes, metallic paints for splattering and even using metallic gel pens for details was enough "bling" on the small space on an atc. The most important part of this technique is the choice of embossing folder. I used 3D folders as they are much more raised and defined but you definitely need to have enough open areas to colour in black to make the whole design pop.

"Wonderful life"


"Shine brightly"


"Remember to play"


"Just breathe"


"Live your story"


"Live this life"


I've included this picture of the first one shown at the top
as I didn't realise until after I took this photo that I had
missed colouring a couple of small areas in the middle.
Can you see them? It's so easy to miss. 😉

Tuesday, April 11, 2023

DOTTED WATERCOLOUR TISSUE

 I love the effect of wrinkled tissue paper with any type of liquid colourant. For these samples, I used watercolours (Daniel Smith) but you could easily use Distress Re-inkers, Distress Sprays or any other type of liquid watercolour. The main thing is to not have anything too opaque as the translucency of the watercolours and the re-inkers and sprays I mentioned is that they are see-through enough for the little metallic dots that are already on this tissue paper to still show through in all their metallic glory.  It's much easier to use a paintbrush to get the colours to move if they are already in a liquid state which is why I wouldn't use watercolour pencils, markers or anything that needs to be put on first and then activated with water as the tissue is still pretty delicate and you risk tearing it. Stick with a liquid to start with and it's easy to get wonderful backgrounds.

"Apothecary"


"I create my reality"

"What the flock?"


"Not your job"


"AH! The element of surprise"
(I loved this little cat/bird die so much I had to
do one for my book and one as a raffle give-away.)


"Don't care"

Wednesday, March 29, 2023

ANGELINA FRAMES, FLAMES & FLOWERS

 I have a stash of Angelina Film (& Angelina Fibres) from my days as a cloth doll maker decades ago. It's wonderful stuff and creates amazing shapes, and changes colour, and you can burn holes in it when using a heat gun. For this class, I used a tea-light candle to melt and shape strips to make the flowers and smoke/flames. If you have some, dig it out and have a play. Don't put it directly in the flame though, aim it for the warm airflow directly above the flame, about 4 or so inches above the top of the flame. That'll be enough to heat it and distort it. It gets hot so maybe use tweezers to hold and shape the strips so you don't burn yourself. Ask me how I know! 🔥 
Don't forget, to view larger images, click on the first one, scroll through. They are a much better size and you can see more detail.


"Toxique"


"I'm under your bed"


"Life is art"


"I am that kind of girl"


"Trust the timing"


"Sea the positive"

Wednesday, March 15, 2023

STENCILS & STAMPING

 Stencils and stamping work so well together and it doesn't matter if you want to use your more open-style stamps or the solid silhouette stamps, both look great. The ink I've found works the best for stamping the black focal images is the Versafine Clair in Nocturne (black). It is a pigment-based ink and is extremely black and juicy which means it covers the stencilled design really well. I chose to use Distress Oxide Inks for the stencil colours as these are very opaque in colour so show up perfectly on the Bristol Smooth card. Of course, Oxides and the black Versafine Clair will both stay wet for quite some time and on some of my atc's I was worried about smearing the inks so I used super fine clear embossing powder after the stencilling and stamping part of this technique. It may not stick to all of the stencilled areas but that doesn't matter as imperfections in embossing are not an issue as far as I'm concerned, particularly when it is clear embossing powder!

"On the inside"


"Live everyday"


"Mind like a lens"


"People"


"Choose to shine"


"Collect beautiful moments"


Tuesday, February 28, 2023

LIQUID LATEX MASKING

 Masking with masking fluid is something I've been meaning to try for a long time. I read up a fair bit before deciding to do this class and have opted to use Liquid Latex instead of masking fluid. It works just as well though it is a little thicker than a lot of the masking fluids that are available on the market. You can thin it down with a little distilled or bottled water but never shake masking fluid (or liquid latex) as it will cause bubbles, stir only. For all of my samples below I used the liquid latex on 300gsm watercolour paper, waited for the latex to dry (about 5-10 minutes), and then smooshed it into Distress Oxide Inks on a craft sheet to add the colour. Once again, wait for it to dry, then the big reveal.... rub off the liquid latex to show your white areas that you can colour or leave white. It's actually a lot of fun to do this technique but you need to have an idea of what you want to do and what will be left white before putting the latex down. Hope the girls like doing it!

"Ghost"
(my favourite!)


"Disconnect"


"Plant lady"


"Make today amazing"
(hand-drawn with Signo DX 0.28 gel pen)


"Choose happiness"


"Go with the waves"

Tuesday, February 14, 2023

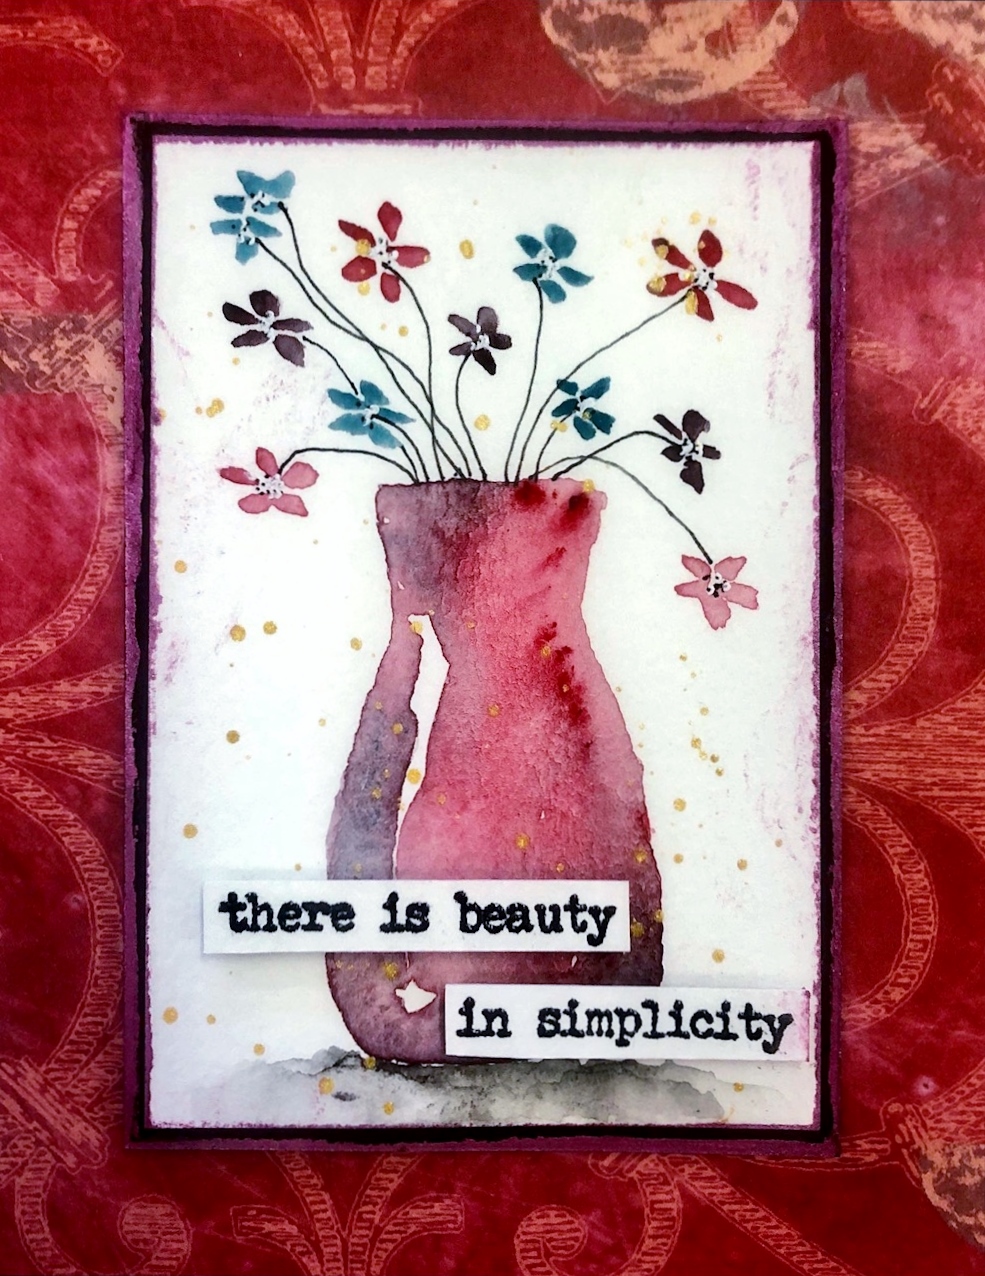
WATERCOLOUR SHAPES

 This particular technique uses basic shapes to create an outline which you then colour in with a watercolour brush and some water. I used a combination of watercolour paints as well as my Distress Oxide Sprays and normal Distress Sprays to create my samples. I found using simple shapes like bottle cap lids and similar circular shapes to be easy to create the outline but I found myself wanting to try some other shapes. So I looked through some of my metal dies and found some square, hexagon and even a vase die that were all open shapes that I thought would work with this technique. They worked perfectly! I did have to use my magnetic pick-up tool to hold the die while dipping it into the watercolour but that worked just fine. Such a fun thing to do with watercolours and there are a myriad of ways you can further embellish these simple watercolour shapes. I hope the girls enjoy doing these. 


"Vanishing story"
(The shapes in this background were made
using the Hexagon Die by Sizzix)


"Simplicity"
(This one I used an open vase die shape to create
the vase outline, which I then coloured with plain
water to fill in the centre. The flowers were
painted with the tip of my paint brush.)


"Dearly Departed"


"Peculiar"
(Simple circle shapes created with a small lid.)


"No rain no flowers"
(Another one where I used a small square die shape
to create the square outlines, then filled in with a
paint brush & water. A mask was made using the
same die and I used the waste to mask off the
outside of each square and stamped the inside with
various floral stamps. It takes time but looks effective.)


"Find joy"
(Another one created in a similar fashion to the one
above but just using a couple of bottle cap lids in 2
different sizes.)


Saturday, February 4, 2023

TEA BAG ART

 For over a year I have been collecting used tea bags to use for an atc class and today we'll finally get to use them. This will be the first class back for this year so it's #1, Book 29.  Tea bag art has been around for quite a long time and there are so many different things you can do with them. I chose to use them in two different ways, 1: open them up, tip out the tea bag leaves and then glue down the bag onto watercolour paper and hand-draw on them (or stamp) and colour with watercolour pencils. The second way was to once again open the bag, tip out the leaves but then re-close it and attach it to the background so it still looks like a tea bag. I chose to hand draw on most of my samples,  except for the stamped one and my cover and card that I made are stamped, not hand-drawn. Hope you give it a go, it makes a great vintage background.

"Own your dreams"


"Sweet dreams"
(Notice the music notes,
so did you sing it?)


"Perfect"


A short video of the above atc showing the fantastic
shimmering properties of the Lisilinka metallic
watercolour paints. 


"Life is art"


"never stop exploring"


"Enjoy"


This one is my book cover and measures 8" x 6", 
or 20cm x 15cm. I used 3 opened tea bags
for the background in this one.


This one is the card I made using a tea bag
for the background. It was coloured with
Distress Crayons. I hand-wrote the sentiment.