Wednesday, February 27, 2008

Webbing Spray, Crackle & Award

Firstly, let me thank the girls who nominated me for the "You Make My Day" Award, Jenny, Sarah and Linda. Check out the blogs of these extremely talented girls....a visual treat for sure!


The You Make My Day Award is for being an inspirational blog! The rules for the “You Make My Day” award are to re-present it to 10 people whose blogs bring you happiness and inspiration and make you feel happy about blog land. Well, with all the blogs that I have been visiting this little award has popped up numerous times so I'd just be sending it back to the same people again so I'm going to cheat a little here and just say ....go visit my favourite blogs link down the side and take your pick!!! Blogging has bought all types of people together and though we may not all like, or be inspired by what other people do, it's good to know that there's someone out there that you can connect with. How boring and predictable if we all liked the same stuff anyway!


We had a little chat about this last night at my webbing spray atc class. One of the girls had seen Sweeney Todd and was not at all thrilled with the blood and gore aspect of it but one of the other girls said she and her girlfriend just about laughed all the way through! Takes all types in this World and I, for one, am EXTREMELY happy about this!!! lol I have yet to see this but I just know I'm just gonna love it.....are you surprised???


Onto some arty stuff.....as I said, last night's atc class was on webbing spray. We used a couple of different techniques of laying down the first lot of colour for the background before using the webbing spray. First was Tim's "smoosh" method.....distress ink pads "dtcs" (that's direct-to-craft-sheet) on the Ranger craft sheet, spritz with water, lay down cartridge paper, pat down, twist 45 degrees while on craft sheet, then lift....amazing coloured background. One of the girls, Nicola, used Spiced Marmalade and Fired Brick.....OMG!!! This looked like a fabulous sunset!!! My favourite colour combo for this technique is Peeled Paint & Weathered Wood but thought I'd step outside my comfort zone and try Vintage Photo and Broken China. Here's the 8" x 11" sheet with that colour, also with the black webbing spray added...


If you still have some of the ink and water left on the craft sheet you can do it a second time using another piece of paper and this will give a completely different effect. This is the result of the remaining ink/water "smoosh"....


The second type of background we did was with the Glimmer Mists , these are new spray colours with a wonderful shimmer that we've had at Scraptivate for a little while. The colours on this one are Latte and Patina. No webbing spray on this one yet...


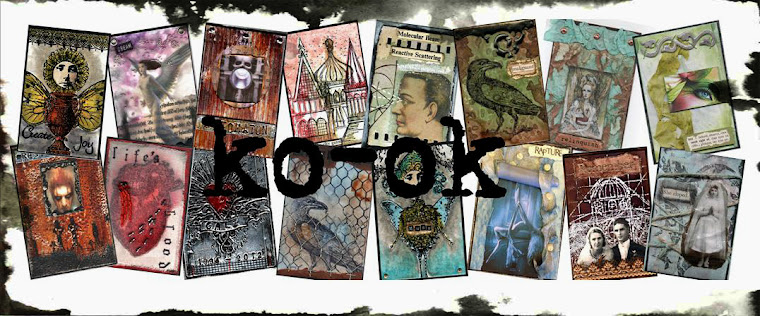
This is the raffle atc for last night......just a little big of fighting over who was going to go home with Johnny! Do you like the little shrink plastic heart?


This next atc is for the Crackle Technique class that's just over a week away. We'll be using the Helmar 2 step crackle over images and the Distress Crackle Paint as well as the Crackle Accents.


GOSSIP: Who's the well-known "arty" girl who's going scrapbooky??? ~insert sing-song voice~......I'll never tell, I'll never tell..... No, I don't take bribes....you're secret is safe with me Ms "X"!!! hahahahahaha

Saturday, February 23, 2008

Credit Card Technique ATC samples & Faux Metal

Thought it was time for a new banner. Thanks again Dawn for making these....you're a legend!

The people who came into the shop and saw the credit card technique pages from my last post couldn't believe how different they look in the flesh, so if you've put off trying this technique, don't wait any longer. You'll be amazed at how quickly you can turn out a fabulous background in such a short amount of time....very soon you'll have a great collection of background papers in all sorts of colours, this is the great thing, you'll come up with some unique colour combinations. My only advice is to remember to write the colours down for each page on the back of the paper as you do it, your brain might go into "excitement overload" and you may forget what colours you've used! lol

First atc sample using my favourite Quinacridone Nickel Azo Gold & Dioxazine Purple.

"Classic Mona"...


"Beautiful"...
"Temple".... In my atc classes I ask the girls to try to tell a story with their atc, rather than simply putting images down that have no relationship to one another. It makes it a lot easier to find what you are looking for if you know what direction you are going with something. This of course applies to collage, canvases, altered books, in fact anything really. So this particular atc is a little more of a taste of my dark side....take note of the drippy blood up the top, and the little shrink plastic hearts...make of this one what you will. ;-) or should that be :-/

Here's the last one, the raffle atc for today's class. "Radiant"...


The faux metal part of today's class is using the foil tape (with adhesive on the back), mounted to chipboard, then distressed with either an awl (paper piercer) or Tim's cool wire brush thing, then rub paint into it and immediately wipe the paint off. Looks like little bits of distressed metal. These are on the corners of my "Temple" atc above.

I was going to show them how to make faux metal out of credit cards, but having another play with it this morning, I think I'm going to make that a class in itself...would rather them concentrate on their backgrounds and little metal-foil embellishments today.

Saturday, February 16, 2008

Credit Card Technique Backgrounds

I think Credit Card Technique backgrounds would have to be the easiest and most spectacular of all the different backgrounds that can be made! A big statement I know...but if you haven't tried it grab yourself a piece of sketch paper or cartridge paper, some paint, a water spritz bottle and a credit card - take a tip...don't use your current Visa card, swipe machines don't like paint gumming up their works! lol
Here's my samples for next week's atc class, including what colours I used to make each one. The colours are listed in order of application, one over the other. Water spritzing is done right at the end and no, you don't wait until it's all dry, just keep working constantly. No atc samples yet, just the backgrounds - these are all A4 size (approx 8-1/2" x 11").
First, my ABSOLUTE FAVOURITE!!! Quinacridone Nickel Azo Gold & Dioxazine Purple (both Golden Paints)...

next...Trans Magenta & Prussian Blue (both Jo Sonja)


next...Jo Sonja Aqua, Micaceous Iron Oxide (Golden), Jo Sonja Warm White


next...Monte Marte (brand) Veridian Green, Folk Art Metallic Antique Copper...


next... Jo Sonja Carbon Black, Quinacridone Nickel Azo Gold (Golden), Jo Sonja Warm White...


next... Sapphire & Burnt Umber, both Jo Sonja...

next... Cobalt Teal, then Cadmium Red Light, then Iridescent Silver Fine - all Golden...


....are you sick of them yet????.....

next... Paynes Grey (Golden) then Jo Sonja Warm White...


last one....Jenkins Green, Iridescent Copper Fine (Golden)...


I think I forgot to mention how much I love this technique....as you can tell by the samples here!!! This is one to give it a go, great for covers of altered books and chunkies as well as backgrounds for cards or atc's.
Simple instructions:
1 A4 piece of cartridge/sketch paper (a little thicker than ordinary copy paper)
paints - your choice of colours
water spritz bottle
old credit card
1. Squeeze on a line of paint up the top of the A4 (Quarto sized) piece of paper.
2. Using the credit card at a 45 degree angle drag it down the paper from top to bottom, scraping the paint along as you go....make it thin - you want coverage of the paper but not big clumps of paint.
3. Do the same thing with your second colour, thin line of paint up the top, drag it down...don't wait for any of it to dry, just keep working.
4. Take your spritz bottle and spray about 5 or 6 pumps over the page, trying for some larger splotches of water by putting your top "pump" finger over the hole a bit so it sprays out unevenly.
5. Count to 10, then take your credit card again and drag it down the paper, wiping the excess water and paint off.
6. Marvel at your creation!!!

Tuesday, February 12, 2008

Colourwash Backgrounds & Embossing

Tonight's atc class is on Colourwash Backgrounds. The Ranger Colourwash Sprays have a fantastic range of beautiful colours, same range as the alcohol inks. This one below has lettuce and cranberry with a bit of butterscotch sprayed over the top. I then used my new Inkadinkadoo Bat Flourish stamp and embossed it with white embossing powder. I think embossing powders are highly under-rated! They are an old stampers favourite, I don't mean "old" stampers....but an old technique. There are many different ways of incorporating stamping into scrapbooking, altered books and all types of mixed media. It works on fabric too!

"Flight"...

Another neat trick with embossing powders is to mix your own colours! I do this for the girls in my atc classes and I have written on the jars the amounts to use of the various colours to get the same effect. This next atc is one that has what I call "Copper Dreams"....4 parts copper embossing powder to 1 part copper glitter. Very subtle copper shimmer and such a beautiful colour, unfortunately once again, the scan doesn't do it justice! Try it out.....you never know, you might just get adventurous and do some yourself. There is another couple of colours I use - Antiquities Cool and Antiquities Warm as well as Antique Pewter. When I go to work today I'll write down the quantities to make them and then post here as an Edit.

Below are some of my embossing powder "recipes"...

Antique Pewter is 1-1/2 parts black and 2-1/2 parts silver

Antiquities Cool is 2 parts silver to 1 part copper

Antiquities Warm is 2 parts silver, 2 parts gold and 1 part copper

Patina Gold is 2 parts black, 1 part gold

Granite is 5 parts black, 1 part white and 1 part silver

Antique Brown is 1 part black and 1 part copper

Copper Dreams is 4 parts copper and 1 part copper glitter

I use a tiny little measuring spoon for measuring the quantity, that way I still have enough of the original colours left over to use them as they are.

The copper/glitter colour embossing is the filigree stamp across the bottom and also the line above each set of words, wish you could see how good this looks irl! The image is done with transparency/rubbing alcohol transfer onto scrapbook paper, then a fine crackle stamp was stamped over the whole piece, some etal metal paper in the top corners finish it off.

"If you wait"...

Sunday, February 10, 2008

Canvas class & Faux Leather

.....and a wonderful time was had by all.....well, at least I had a wonderful time anyway! Yesterday was a big day for me as I taught my 1st canvas class in the morning and then my faux leather atc class in the afternoon. Both a reasonable size - 14 in the canvas class and 17 in the faux leather one. I was a a bit over-ambitious as far as the canvas class was concerned as I let them choose beforehand 1 of 4 canvases to do. Consequently, it meant I was teaching 4 different canvases in the one class!!!! Well, 3 actually, as only one girl (hi Mel!) decided to do the retro one which was using peeled paint as a technique, which she had done before so she just plodded along merrily by herself.

I was so impressed with how all the canvases turned out and I think the girls were pretty happy with them too! It was a surprise to them how easy and quickly it all went together. I did warn them before though that they couldn't expect to turn out a canvas that looked exactly like mine, as I couldn't even do that....any time you start applying paints in layers and blotting away here and there, you won't get 2 the same! My main message for them during the morning was, I want you to feel comfortable and confident that you can go home and do one yourself without going into a panic about not being able to do it!


Of course, I forgot to take my camera with me but I have another canvas class on the 8th of March and I'll definitely take it with me then! I think some of the girls from the class yesterday were talking about booking into the next one a well and just doing another canvas!!! lol


So then in the afternoon after a quick clean-up it was time for the faux leather class. This also went along swimmingly! A very quick and easy background technique using strips of masking tape laid down and then painted over. It's all in the layering of colours and rubbing off that gives the wonderful distressed look. This is another one that needs to be seen "irl" to appreciate the texture and pattern.

This one was the raffle atc...."No wings"... (congrats Deb for winning....liked your happy dance!)

Another sample one..."What you do"...


An update on the beaded doll class that was mentioned in the previous post, it's definitely going ahead - 6 hour class which will include the frame as well. It'll be on the 12th of April, a week before we leave on our BIG trip, so if you're in Perth and you're interested in it, ring us at Scraptivate to book in. I have a suspicion that this will book out so I'll run it again after I come back. Here's a couple of pics of some more beaded dolls I've done....used to love doing these...beading is very therapeutic and relaxing!


I thought I'd change my blog-header on this post as well....thanks Dawnie, I have a few to choose from! Love the German Scrap that you've used on this one!!!

Friday, February 1, 2008

Faux Leather & Beaded Doll Class

Below are the 2 atc's that I completed using the Faux Leather background from the previous post. I've left the cobalt turquoise/burnt sienna one without anything on it for the moment as I want to show the girls in my atc class how it looks without any images etc on it. So these are the other two...

..."Cultivate"


and "only the young"...

I'm also thinking about running a class at Scraptivate (where I work/teach) on a beaded doll in a frame that I did a while ago when I used to make fabric soft sculpture dolls. I also loved doing beading as well so this is also incorporated too! What do you think? The size of the little doll is about 3" and is hand-dyed. The wings are made from air-dry clay and the hair is tyvek. It may be a little different to this one as I'd have to make another one as a sample but basically the same sort of thing. (Ehecatl is the Aztec God of Wind)


Thankyou to my pal Dawnie for the wonderful banner! I have several that she's made while she's trying to forget the pain in her head from a recent "tooth episode"....big hugs to you Miss Prawn!