Tuesday, August 30, 2022

DEBOSSED EMBOSS

Using embossing folders and card stock to emboss an image into cardstock through a die-cut/embossing machine is always a great way to create a quick background. The reverse side that is not generally used is a debossed design. For this particular technique, I have used the debossed side created using 3D embossing folders. The 3D folders have much greater depth and detail than a standard 2D folder. The 2D ones will work but I was happier with my samples from the 3D ones.  To colour the backgrounds I used my Distress Oxide Inks and foam applicators. 
A quick and easy technique that looks so effective in the flesh.

"Sticks & stones"


"Release the Kraken!"
"Digging in the ground"


"Bugs"


"Use your wings


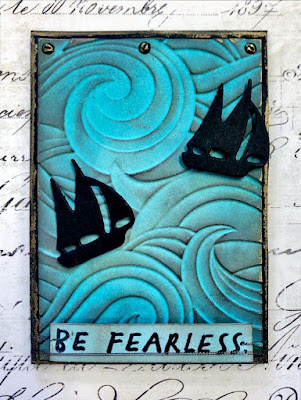
"Be fearless"


Here are two cards that I made using the new Skull 3D embossing folder from Sizzix. 
The first one below is plain white card stock that has been embossed using a piece of black graphite paper against the card as it was run through with the embossing folder. It gives a great black-and-white effect for very little effort. 

This one has the same black graphite background but with the addition of some of the brown Distress Oxide Inks rubbed over the top for added colour. I also flicked a little of the Distress Mica Stain colours on the background and then fussy-cut out one of the skulls from another background of the same design to give the layered look. The added cut-out skull has some Ranger Foundry in gold and copper applied for further interest.


Sunday, August 14, 2022

LAYERED MASKING

 Masking stamped images is a technique that has been around forever but it always gives such a great impact when used with lots of white space left on the background. For my examples, I have used both Distress Inks and Distress Oxide Inks and the overstamping in the black was Black Soot Archival Ink. Silhouette-style stamps, meaning more solid stamps, will always have the greatest impact on this type of technique. I have used masking paper which is tacky on the back, as well as sticky note paper that is also tacky all over the back. You can die-cut the sticky note paper if you put a piece of non-stick release paper on the back before running it through your die-cut machine. I keep the release papers from my A4 size adhesive magnet sheets and A4 size double-sided adhesive sheets to use for this type of method as well as keeping excess double-sided adhesive on it for later use. 

"Lost in the woods"


"Troublesome ending"
(Who knew a zombie could end up on the
Serengeti? I was going to draw in a severed
arm but thought it best to leave it up to
the imagination.) 😏


"Unwaveringly"

"Middle of the night"
(Yep, loved this one so much I had to do it twice!)


"Untried"


"Walk in nature"

Tuesday, August 2, 2022

STAMPED METALLIC WATERCOLOURING (BLACK)

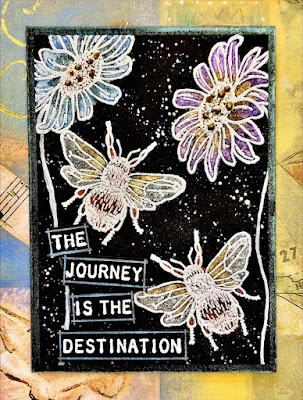
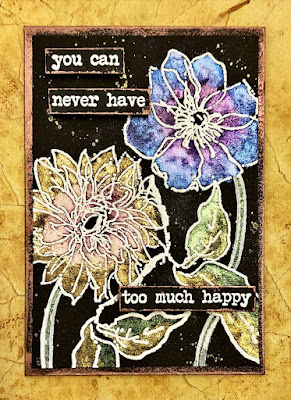
 Metallic watercolour paints show up beautifully on black watercolour paper. Some brands are better than others as they are more highly pigmented. The interference/iridescent paints that won't appear on white cards are gorgeous on black! To make it easy, I have embossed stamped images with white embossing powder, keeping the watercolour paint within the stamped areas. I even used clear embossing powder on one of the atc's and this worked as well, however, the white embossing powder gives you the most contrast. If you have some metallic watercolour paints, give them a go on black card, the shimmer and shine when tilted to the light is unbelievable!

"Choose to shine"


"Family"


"Beauty in simplicity"
(This embossing is the one with the
clear embossing powder.)


"Destination"


"Too much happy"


"Use your wings"


"Use your wings" close-up


Tuesday, July 19, 2022

LAYERED GEL PLATE BACKGROUNDS

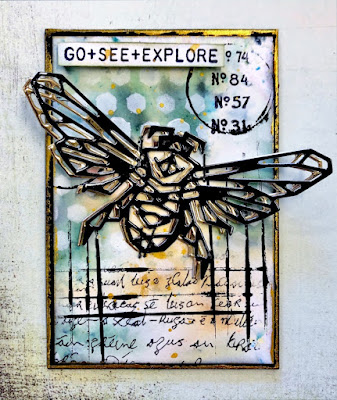
 There are so many ways to use a gel plate; for this class, pigment powders are the base for this layered background technique. Stamping, stencils, acrylic paint, and dies are all used to add further interest to the gorgeous coloured backgrounds. I used Nuvo Shimmer Powders, Lindy's Magical Shakers, Cosmic Shimmer Pixie Powders and even my Ken Oliver Liquid Metals on the gel plate to create my samples. Then it's multiple layers of all the other products that are added to finish them off.


"Live your story"


"I'm so goth"


"Fake"


"Ringtone"


"Go+See+Explore"


"Digging in the ground"


Wednesday, July 6, 2022

ALCOHOL INK LANDSCAPE SCRAPE

 Alcohol Inks are always good for a book cover class and we are up to Book #28. For this technique we'll be taking advantage of how beautifully alcohol inks react when scraped across the substrate. I'm using the Kirkland Photo Paper for this technique but Yupo or Grafix would work equally well. I do like using my metal angled palette knife rather than something like a credit card as it's much easier to see where the ink is going if it's not covered up by the size of a credit card while doing the scraping. I stumbled across a happy accident too that created the most gorgeous swipes by using gel pens. All stamping was done using Ranger Archival Black Ink and even though it was left to dry for a long time, I still found it would smudge a bit so to save any mishaps, I clear embossed the stamping. For the drawing, I used my .01 Uni Pin Fine Black Pen and clear embossed the drawn images as well. 

I haven't done my cover yet as we've had a new addition to the family, a new granddaughter for hubby and me. We welcome Mila Grey to our family and this brings us to 3 grandchildren. The life of a grandparent is surely a wondrous thing.  I love them all so very much and really look forward to some more years of baby and toddler antics. 

"Strange noise"


"Peace within"


"Distant and dying"


"State of mind"


"Organically grown

"Focus on the good"


Little Mila Grey is 24hrs old in this picture. 💟

Tuesday, June 21, 2022

ABSTRACT WATERCOLOUR

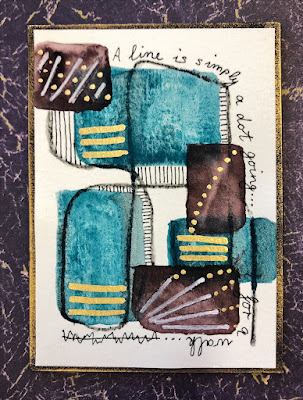
 Since I've been getting a bit more into various watercolour techniques, I have managed to acquire a few different brands of watercolour paints. I love the dark moody colours of the Boku-Undo E-Sumi Shadow Black and Shadow Black Mei colours, the gorgeous transparency of the Daniel Smith watercolours, Gansai Tambi paints tend to be more opaque than transparent but the 6 set of the Gansai Tambi Starry colours are my go-to for golds in various shades. I also use a variety of white, black, and gold gel pens to add further detail. So this class is all about abstract shapes on 300gsm watercolour paper, how the colours can bleed into one another and then the embellishing when it all dries. I've seen quite a lot of these shapes and styles on the socials but wanted to add words to mine and found handwriting around the shapes didn't detract from the flow as much as a stamped word would. I hope the girls agree. 

"Balance"


"Like the moon"


"Something you find"


"Expect nothing"


"Going for a walk"


"Life is short"


Here is a card I made using the same technique.
"Life is better with friends"


These are a few of my favourite pens that I have used to
do the extra embellishments. That DecoColor Premium
Paint Pen in Gold is just absolutely wonderful!

Tuesday, June 7, 2022

WATERCOLOUR BOTANICALS

 I've had a set of Tombow water brush markers for so many years but I have a limited colour palette. Whilst in Kmart (Australia), I found a set of 12 colours of water brush markers for only $8. After watching a few Youtube videos I had an idea of how I wanted to use them and they worked SO well and did exactly what I wanted. I wanted to expand from the Kmart set of 12 I bought, so I purchased a set of 36 colours of Ohuhu water colour brush markers from Amazon Australia for a pretty good price (around $31AUD). This expanded my colour palette and worked beautifully. 

The girls in my class can be a bit put off if they have to draw or paint free-hand so this is really the best of both worlds, a pen style marker to do your initial laydown of colour, then a watercolour brush (I used a #4 round brush) or an aqua brush to get the colour to spread and form the shape you like. I love the various ways of doing botanicals with these markers. 

"Bloom and grow"
(The silver speckles are from the Ranger Foundry
Wax in Sterling mixed with a little isopropyl
alcohol to make a runnier consistency, then
splattered on with a paintbrush. After heating
with a heat gun, they shimmer like nothing else!)


"Bloom and grow"
(This is a better picture showing how sparkly
those silver speckles are.)


"Collect moments"


"Dream big"


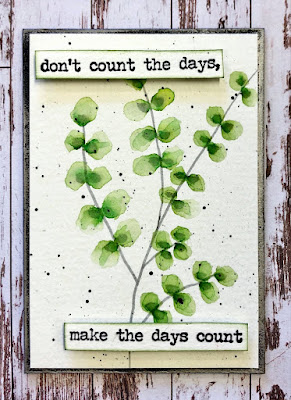
"Don't count the days"


"Simplicity"


"See beauty"


These are samples that have not been completed and turned into atc's. They'll probably end up being cards but I wanted to include them here, because, why not. 😊