
I've been wanting to do the Eclipse Technique for quite a while. I just had to wait for the supply of skinny 3mm wide black and white foam strips and the little tiny black square foam pieces before tackling it. As ATC's are so small, you have to be very selective about what type of die you can use on it. The usual way of doing Eclipse has been to do a name using large letters across a card. So the little die-cut letters on the first sample are only 3cm high and just fit on the ATC. You can use either black craft foam under your die-cut shapes or alternatively, as I have in some of my samples, use the skinny foam strips and squares to raise the die-cut shape up. The important thing to remember is you are cutting your die shape from your existing background, then placing it back into the same space, but raising it. You also need to make sure that you keep any little bits that come out (like the triangle in the letter "A" and the oval shape from the "U" as you need to replace them to give the background continuity). The shape can be as simple as the oval shape in the 2nd example, "Magic", which is the oval shape cut from a stamped image on the background. Or a more intricate example like the gravestones in "Wicked" below.
"Far Out"

"Far Out" side view

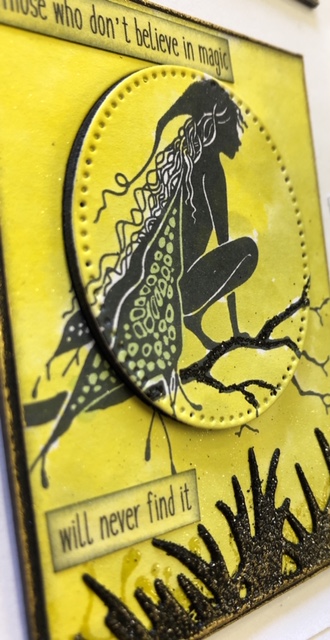
"Magic"

"Magic" side view
"Neverland"
(The fairy is stamped onto the jar die shape
before putting it together)

"Time Flies"
(Same jar as before but this time it has
some flies in it)

"Wicked"
(Vellum ghost placed over raised
gravestones... a bit fiddly this one and
to make the gravestones stand out,
I've drawn around the edges with a
fine black marker. Unfortunately
you can't see the dimension, but it's
there, trust me!)

"Hot Mess"

This final example is not an Eclipse one but I wanted to post it for the moon shape. I was trying to find a good moon die-cut and they are all just circles or crescent shapes. I wanted some texture to it. So I cut a circle from white card, spritzed with Perfect Pearls spray to give it a little shimmer, dried it, then ran it through the 3-D embossing folder called "Bubbles". This created some craters in the moon. I then added a little shading with Hickory Smoke Distress Oxide Ink on a sponge and raised it with foam tape. Perfect moon!

1 comment:
Kelsey, these are all so super cool! The "far out" is so much my idea of what space looks like...love the centerpiece I. That one..giggle..wonderful work my friend!
Post a Comment