Friday, August 28, 2015

ROCK SALT PEARL BACKGROUND

In a previous class we have used Rock Salt to create gorgeous background effects.  In this class, we'll be using Rock Salt as well as Table Salt but to mix it up a bit and give a lovely shimmer, we'll be adding some Perfect Pearls to the salts.  Because the salt/Perfect Pearl mix is dropped into liquid, the water acts as a setting agent for the Perfect Pearls so they won't rub off.  I used Distress Spray Stains to do the backgrounds as they are both vibrant and wet enough to place the salt onto straight away.... but if it starts to dry before you ready, simply spray with a little water.  The salt acts like a wick and draws up the surrounding moisture to leave intense colour concentrations and the little bit of shimmer from the Perfect Pearls is just an added bonus!   I love how this first one below took on a rust-like appearance... all on a humble piece of watercolour paper.  Although, this technique will work on gloss card stock as well, the "Beautiful Life" atc below is on gloss with no Perfect Pearls added, just the salts!

"Only the young"... (Rusty Hinge & Smoked Hickory)

"Have no fear"... (Vintage Photo and Stormy Sky)

"Controlled"... (this time I used Gelato's, water and salt 
to create this background!)

"Untie the ribbons"... (Evergreen bough and Black Soot - be careful
using Black Soot as it can overpower other colours!)

"Beautiful life"... (this is the gloss card background
with no perfect pearls, just Broken China, Twisted Citron
and salt)

The images below are just the backgrounds before anything
has been added to them.  I find it easier to work on a size that is
2 or 3 times the size of atc's and then cut them up, so approx 18cm x 7cm 
(or 7" x 2.5").

Rusty Hinge & Smoked Hickory

 Vintage Photo & Stormy Sky

Gloss Card - Dusty Concord & Spiced Marmalade

Evergreen Bough & Black Soot.

Tuesday, August 11, 2015

FOIL STAMPING

Using Foil in stamping is another of those techniques that seems like it's been around forever!  There is a resurgence in interest in it though and there are now several ways to apply foil to your projects.  Of course the simplest way is to use a glue that will dry with a tacky surface that you then apply the foil to.... I like to use the Zig two way pen.  When you apply it it is wet, allow it dry for a few minutes (around 5 or until it goes clear-looking), place the foil (coloured side uppermost) on to the dried glue and press lightly with your fingers, rub over gently and when you lift the foil it will have transferred to the glue.  This same technique is used with the Ranger Sticky Embossing Powder, only you can stamp an image with an embossing ink, tip on some Sticky Embossing Powder, tap off the excess as you would any normal embossing powder and then heat it with a heat gun.  You only have around 30 seconds or so to get the foil onto the project so be prepared beforehand!  This is like a sticky glue so it will also adhere other things (like flocking, microbeads, glitter etc).

I have also experimented with my laminator.  Now I know that to laminate an image with foil you're supposed to use a laser printer to print your image, then run the image through the laminator with the foil on the top to adhere the foil but I tried it a different way.  I stamped an image with clear embossing powder, heat set it and then ran that through the laminator with a piece of foil over the top (enclosed in a piece of plain paper first to protect the foil) and it worked perfectly!  So you can see there are a few different ways of using foil and as it doesn't scan very well, I've shown below the samples with the scanned image first, then a shot I took with my iphone where I've turned the atc to the light to get the reflection of the foil to show up.

"Enchant"...


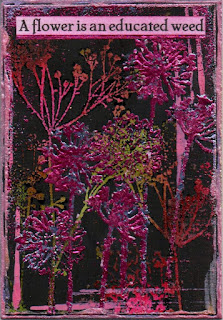
"Educated Weed"...


"Oh look"...


"Let's pretend"...


"Luminosity"...


"Black & White World"...


These last two below are the final samples from my previous class - Tyvek.  Loved this class!

"Right decision"...

"Solution"...