Tuesday, November 19, 2024

ALCOHOL INK VASELINE RESIST

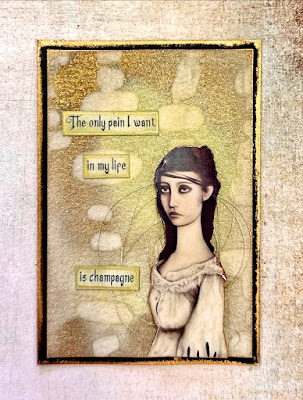
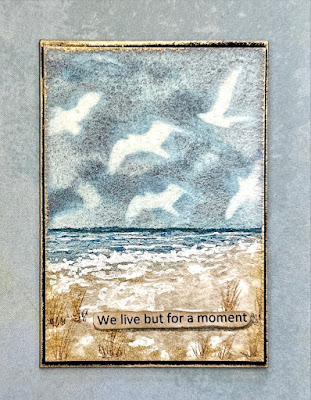
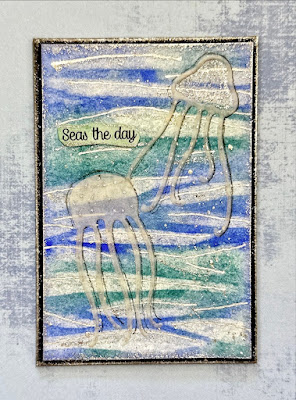
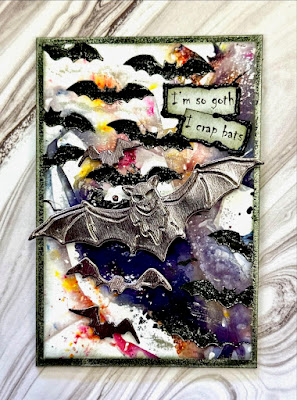
 This class uses alcohol inks and Vaseline to create a resist technique. The most important part of this technique is care in choosing which stamp to use. It needs to be big enough to be a focal point and the colours of your alcohol inks need to be dark or bright enough for the resist-stamped image to show through. These atcs can then be further enhanced with words, die-cuts, rub-ons, stickles, or any of the myriad of embellishments that we all have and sometimes forget to use.
To see these in greater detail, click on the image and scroll through. 

"Whispers in the crypt"


"Be brave"


"Life is too short"

"Insignificance"

"Different"


"Breathe"


Tuesday, November 5, 2024

WATERCOLOUR FODDER ACCENTS

 I'm always amazed at how a watercolour quick and easily painted subject can turn out to be such a wonderful focal point on an atc or a card. With the addition of black and/or white gel pen markings, then cutting the design out, and raising it up on foam tape, it takes a simple atc to another level altogether. You don't need to be a fantastic watercolour artist either, naive paintings of leaves, mushrooms, flowers, and even child-like houses, will all work. These are so much fun to create you'll want to just keep going until you have a huge stash of fodder that you can use at another time on an atc, in a journal or on a card.

"Ghosts"

A close-up so you can see how I've mounted the
words onto a piece of acetate that is slightly
wider than the background so it is bowed
in the middle and pops up a bit.


"Home"
(I love this quote! 😊)


"Find what you seek"
(This background was one I had made in a previous
class and the colours just worked perfectly for my
leaf and mushroom fodder.)


"Just breathe"
(You can't see it but the leaf on this one has been
crumpled up and raised up higher in some areas
with a double-layer of foam tape to give a very
dimensional shape to the leaf. I spritzed
the back of the watercolour painted leaf to make
it easier to crumple up as it is 300gsm watercolour
paper and is very thick.)


"Choose to shine"


"Keep life simple"

Monday, October 21, 2024

MARBLED STENCILS

 The last time we did marbling with re-inkers and shaving foam was back in 2010. It's such an easy technique and this variation is just as effective! Previously we dipped the card into the shaving foam that the Distress re-inkers were dropped onto and then marbled with a skewer onto the foam to create the marble look. This time we'll be applying it through a stencil to give a different spin on it. With 72 colours of Distress re-inkers, there will be plenty of colour combinations that can be created. I'll be using Bristol Smooth cardstock but any white/ivory/cream cardstock will work with this technique. 
To see these atcs in more detail, click on the first one and scroll through.

"Unique"


"Halloween butterflies"


"Full bloom"


"Dead leaves drop"


"Chlorine"


"Otherwise"

Tuesday, October 8, 2024

POWDERED PIGMENTS & COFFEE FILTERS

 Powdered pigments are little jars of fabulous that have multiple colours in them that burst into life when spritzed with water. The assorted colours of tiny pigments in each container make up that particular colour if you mix them together in say a paint palette, but when they are just sprinkled and then spritzed, you get to see all the various colours that make up that specific colour. Black in particular is amazing with lots of shades of blues, oranges, deep purples and others that go together to make black in this format. The brands that I have and use are Brushos, Lindy's Stamp Gang Magicals, Cosmic Shimmer Pixie Powders and Nuvo Shimmer Powder. I sprinkled the powders onto a dry coffee filter, then spritzed to get the colours to show. You can then decide whether to pick up the wet coffee filter and place it onto your glossy photo paper or you can press the photo paper directly onto the wet coffee filter for a different effect. The photo paper absorbs the colour immediately so you can't spread the colour around as it grabs the colour. This is another of those techniques where you can't replicate anything, each individual atc is unique. Glossy photo paper is a great substrate and takes either black Stazon ink well if you choose to stamp or you can use Black Soot Distress Archival Ink, allow both inks to dry though so as not to smear them.

"Half spent"

"Too many tabs"

"So goth"
(The black bats in the background are black
opaque texture paste by Ranger through a
bat stencil.)

"Life is short"

"Grow with the flow"

"Furry"

Wednesday, September 25, 2024

MAGAZINE GESSO IMAGES (TAKE 2)

 This technique is one I'm revisiting and was last done by some of the girls way back in 2011. I used fashion magazines for the images.You used to be able to pick up these magazines in the op shops but they are quite hard to find now unless you're prepared to fork out big $$$ to buy them at the newsagent. In this class, we'll be dry-brushing gesso over a magazine image and then repainting whatever areas you want to alter using watercolours or acrylic paints. You don't have to stick to realism, they can be as weird as you want. 😉

"Be creepy"


"Your coffin or mine"


"Shine brightly"
(Adam never looked so sparkly!)

"Not what they seem"
(I'm not sure if anyone will 'get' this one...
do you know what B.O.B. is? 😏)


"Dieting"


"Stronger"

Tuesday, September 10, 2024

WATERCOLOUR STRIP PAINTING

 This title could be slightly confusing. The watercolour pictures were painted first, then cut into strips and attached to colour-coordinated Gelli prints that show through the gaps in the strips. I used some atc's that I had made in various other classes but if making them for this technique, you need to keep your main imagery towards the centre as the watercolour picture ends up only 5cm wide before you cut it down and you don't want to lose too much detail from your edges. This technique would also be great for a card and you can afford to be a bit more generous with your artwork as you're working on a larger area.

I used Daniel Smith watercolour paints for 3 of these samples, Distress Watercolour Pencils for 2 of them and finally, sparkly gel pens along with Pilot G-Tec C4 coloured gel pens that activate with water for the final one. The moth one with the gel pen colouring was the only one with a stamped image, all the rest were hand painted. 

"Every colour"
(The trees were painted with Distress
Watercolour Pencils then outlined with
a Pilot Black G-Tec C4 gel pen.)


"Collect Beautiful Moments"
(Painted with Daniel Smith watercolours.)


"Live gently"
(Painted with Sodalite Genuine and Hematite
Genuine Daniel Smith watercolour paints
which are both granulating colours.)

"Tomorrow"
(Painted with Daniel Smith watercolours.)


"Small beginnings"
(Painted with Distress Watercolour Pencils.)


"Attitude"
(Stamped image coloured with sparkle gel pens
and Pilot G-Tec C4 coloured gel pens which
bleed when activated with water.)

Wednesday, August 28, 2024

ACRYLIC INKS/DISTRESS RE-INKERS ON PHOTO PAPER

I have used acrylic inks before on photo paper and had forgotten just how vibrant these fluid inks can be on the shiny side of the photo paper. The contrast between the beautiful magenta one at the top and the next one with the black bird die-cuts shows you can also create a more subtle background. The one with the black birds is Winsor & Newton Silver Acrylic Ink and Liquitex Burnt Sienna, a gorgeous combination and silver in real life is stunning! 
Down the bottom of this post is an image of the backgrounds I made using my Distress Re-inkers. These work just as well but take a bit more time to dry. No heat gun was used to dry any of these as the photo paper will blister so you just need some patience and let them sit while you create more gorgeous backgrounds. Black Stazon is your best stamping ink if you want to stamp. Rub-ons also work perfectly on these backgrounds. I used rub-ons on both of the samples with the magenta.

"State of mind"


"Scenic route"


"Fearless"


"Field notes"


"Make today count"


"Keep moving forward"


These backgrounds were made in the same way as the ones above 
but they were created with Distress Re-inkers instead of Acrylic
Inks. They took longer to dry but they still are very cool backgrounds.

Tuesday, August 13, 2024

WATERCOLOUR QUIRKY BIRDS & STENCILS

 I've been seeing an abundance of gorgeous whimsical and quirky watercolour birds appearing all over Pinterest and Google and I love the imperfect and naive style of this type of watercolouring. Virtually anything goes with these funny little birds and you can add their wings, beaks, legs & plumage however you want. I thought I'd step it up a bit by adding some stencilling in the background. Covering the birds with a mask made from paper towels protects them from the inking when stencilling. Of course, I had to do a mini-sheet of quotes to go with these birds for the girls as well as a page of some ideas for various birds and how to draw/decorate them too. I hope they all have fun painting these, I sure did!

"Eat local"


"Foraging"

"No worm"


"Shenanigan enthusiast"


"Fuster cluck"


"Winging it"