Wednesday, July 26, 2017

BRUSHO'S & METALLICS

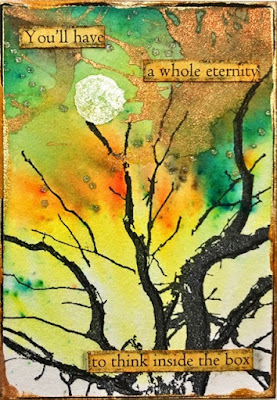
I thought it was time we dug out the Brusho's and had another play with them, this time incorporating metallic colours with them.  I have used both the Ken Oliver Color Burst Liquid Metals (Heavy Metals set) as well as my Schmincke Gold & Silver powder.  The Liquid Metals are already a liquid but the powder must be activated with water first and they both behave quite differently.  For the samples with the faces I've used Jane Davenport's gorgeous face stamp sets which just give you the basic facial features and you add the rest.  I've also tried to leave some white open space on most of my samples as I love the colour contrast between the brightness of the highly pigmented Brusho powders and the white space.  I've also used a fine black Sharpie to add details to the hair on the two face ones.  The green ocean one was simply to use up extra of the Schmincke powder that I had made up and I blended it with a couple of colours of Brusho powders in green shades.  

"A little sparkle"...
(The lighter area in her hair is the Platinum Heavy Metals)

"Inside the box"...
(Copper Heavy Metals in the sky and Platinum Heavy
Metals for the moon)

"Love the sound"...
(Pewter Heavy Metals over Brusho's)

"Broken crayons"...
(this one is using the Schmincke gold over Grey Brusho)

"Salt water"...
(Schmincke gold splattered over a Brusho
& Schmincke gold background)

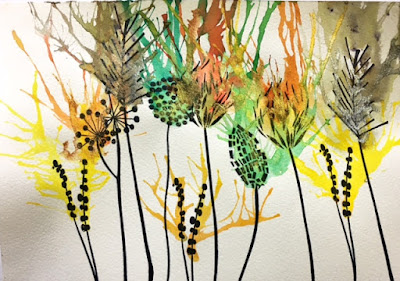
Lastly, these final two are both the covers, neither are finished but I wanted to show the different ways of using the Brusho's and how effective the white space can be.  These are 20cm x 16cm (or 8" x 6").


Really lastly, these two are the final samples from the previous class, Translucent Alcohol Inks.

 "Limited Edition"...

"Auto correct"...


Friday, July 14, 2017

TRANSLUCENT ALCOHOL INKS

Everyone knows of courses that alcohol inks are translucent but because of this, when applied to another surface that is also semi-translucent it creates another wonderful technique.  The receiving surface needs to be able to withstand liquid in the form of alcohol inks and rubbing alcohol without falling apart so something like tissue paper is out of the question.  Enter... deli paper!  It has a waxed side and a matte size which means it has the ability to stand up to the amount of inks & alcohol you need to apply for this technique.  But when dry, it can be applied with PVA glue, gel medium or even a Xyron over the top of another piece of card with a stamped image (or book paper even!) on it and the underneath shows through.  It gives a very watercolour painterly effect.  

See the little hearts on the first card below?  Those hearts are punched out of the deli paper and applied as well, but you need to enclose the deli paper between 2 pieces of normal copy paper as the deli paper is too soft to punch cleanly.  I layer several sheets of deli paper and each underlying layer is softer and more muted so you have lots to choose from.  Pay attention to your white areas too, as you can see below in some of the examples, the white bits add to the effect.  This means you don't cover the whole of the deli paper with ink, leave some white bits showing as these totally blend into the background so you can see the uneven edges where the alcohol inks are.

"Stupid"...

"Live a life"...
(over book paper)

"Key to change"...

"Believe in tomorrow"...


Lastly, this is my final sample from the previous class using the Distress Oxides.
"Periodically"...