Each year my final class of the year is a Christmas theme. Of course, the girls in the class don't have to do this, it's just that I like to challenge myself to see if I can keep to my style while still keeping it in the Christmas style (relatively). I used foil on my die-cuts for this class as I like to make sure that we use what we have and everyone has lots of gorgeous colours of foil.
I usually go quiet on my blog over the Festive Season but I'll be kicking off again in the new year. Seasons greetings and a safe and happy New Year to everyone. 💖
"Festively wrapped package"
"Well hung"
(I didn't have any ornament dies so I used
the smallest circle die I had and then decorated
them with Liquid Pearls.)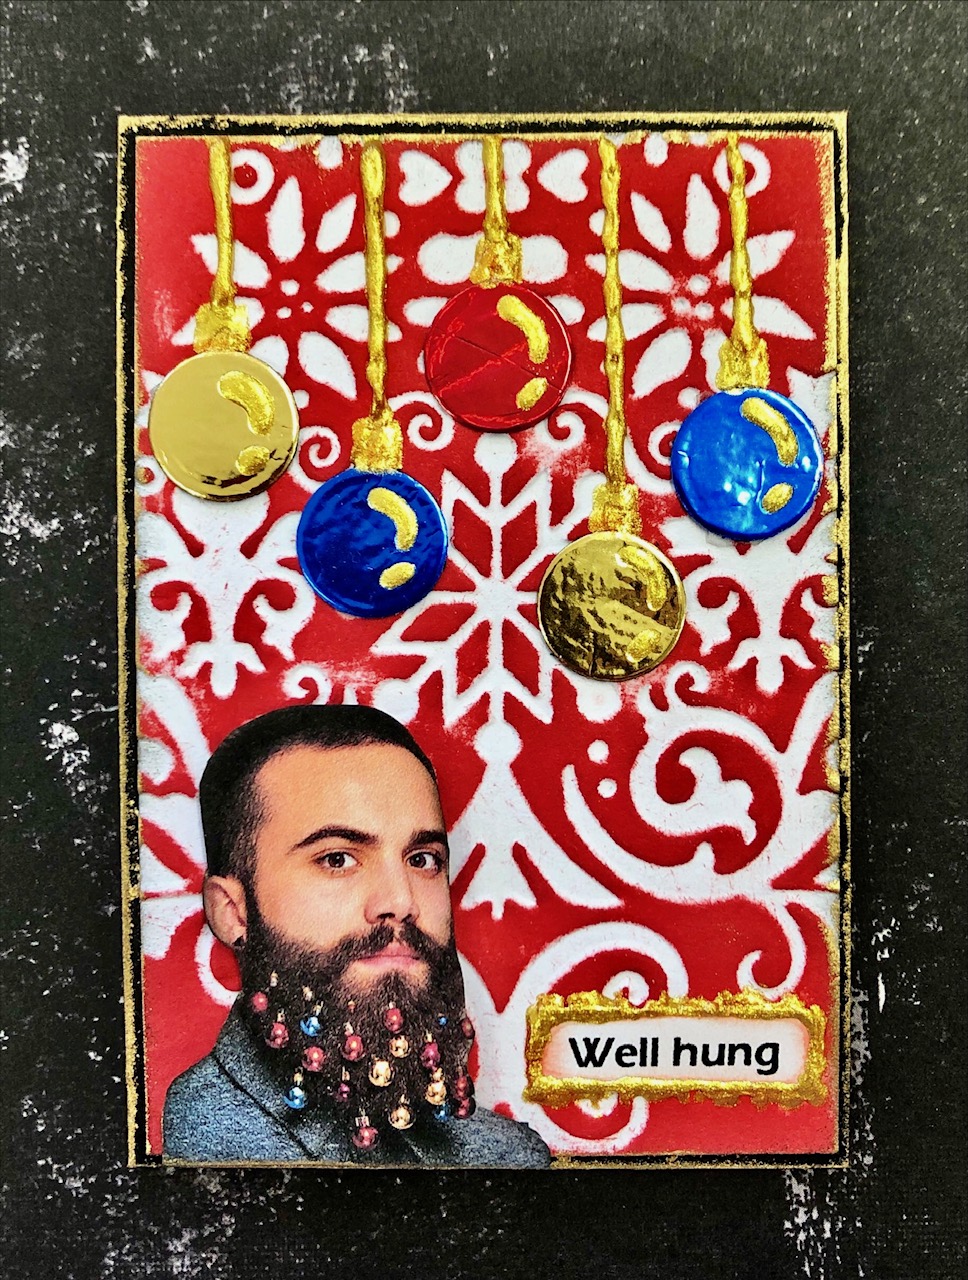
"Dismember"
"Gold and myrrh"
(Hubby took a bit of time to understand
this one. 😉)
"Sparkly"
"Happy Horrordays"

Tuesday, December 6, 2022
CHRISTMAS EASY FOIL
Tuesday, November 22, 2022
BLEEDING BORDERS
This class is another use for re-inkers. I have all of the Distress re-inkers but only about 25 or so of the Distress re-inkers. I figured I'd work out which colours I need to top up as I use my Distress Oxide ink pads (which I actually use way more than my normal Distress Pads now!). I think it's probably the oxidation process that makes the Oxide re-inkers so versatile in this technique. The trick is to only wet them a tiny bit rather than flood the watercolour paper with them, though that's a nice look too! These are all created on 300gsm watercolour paper to help prevent warping.
On another note, I missed my class last fortnight because the dreaded Covid caught up with me. I managed to avoid it for the last few years and have all of my jabs up to date so hopefully, it won't get me again. Pretty lousy few days but it was mostly over in about 7 days. One of the lucky ones I suspect.
"Condemned"
(Frayed Burlap Oxide Re-inker, just gorgeous!)
"Gucci"
"Annoyed"
(Now this is a reality show I'd go on!)
"The life of insects"
"Mummies"
(The proper collective noun for a group of
mummies is a Tanna of mummies. Apparently,
Tanna leaves can control them. A stumble refers
to a group of zombies. Personally, I should've
gone with my own idea for a group of mummies,
a wrap of mummies.)
"Sparkle"
(Slight Twilight reference there.) 😉
Close-up so you can see the sparkle.
Tuesday, October 25, 2022
FLORAL ARRANGEMENTS
"Be authentic"

"Lukemoist"

"You do you"

"Ordinary"

"Grow through"

"Live simply"

Video showing the little dressmaking clips and how I've used them.
Tuesday, October 11, 2022
FOUNDRY WAX
I've used it in various ways as shown in my samples below, listed in order: on a plastic snake, on the corrugated card and on a black die-cut, on plastic spiders and smooshed onto a background, dabbed onto a coloured die-cut and added to a piece of string, wiped over a dry-embossed white background and finally wiped onto the raised areas of a black dry-embossed background.
If you click on the pictures, they will come up much clearer and with more detail.
|

"Chaos"

"Spider's web"

"My sin-twister"

"Sadness"

"Ghoul gang"

Wednesday, September 28, 2022
MICA SPRAYS VARIOUS WAYS
The Ranger Mica Sprays are a beautiful way to add colour and a shimmer to any of your projects. I've used them in a few different ways on my samples below, such as stamping with them, flicking onto a background, colouring die-cut pieces, and using them as paint on a pre-coloured background. This is one of those products that must be seen in the flesh to appreciate how beautiful it is!
"On the inside"
"By the door of the tomb"
"Smiles of nature"
"Middle of the night"

"Return to the sea"

Thursday, September 15, 2022
SIMPLE BRUSH MARKER COLOURING
Brush marker watercolouring is a very simple and quick way to add colour to stamped and embossed images. My examples were all embossed with white super fine embossing powder for the best detail on these floral open-style stamps. Most of my colouring on the flowers was using only 2 colours and the variation comes from the amount of colour put down initially as well as how much water is used when blending the colour out. Less is always more; you can add more colour if you need more depth or shadows. Grey makes great shadows under your stamping and you can continue the blending out with water so your background is not just a plain colour. All of mine were created on 185gsm watercolour paper as this will allow the colours to be blended out whereas ordinary card stock can grab onto your colour from the brush markers and you will find it difficult to get it to spread successfully.
"Field of roses"
"State of mind"
(This is one example that needed to have the complete
background coloured in as the focal points of the bird
and the mushrooms were not large enough to
stand out from the plain white background.)
"Let life surprise you"

"Be authentic"

"Live everyday"

Finally, this is a card I made using this simple brush marker colouring technique that inspired me to shrink the technique down to suit atc's. It does look spectacular on a card front but I'm also pretty happy with how it works on the smaller atc sizes.

Tuesday, August 30, 2022
DEBOSSED EMBOSS
Using embossing folders and card stock to emboss an image into cardstock through a die-cut/embossing machine is always a great way to create a quick background. The reverse side that is not generally used is a debossed design. For this particular technique, I have used the debossed side created using 3D embossing folders. The 3D folders have much greater depth and detail than a standard 2D folder. The 2D ones will work but I was happier with my samples from the 3D ones. To colour the backgrounds I used my Distress Oxide Inks and foam applicators.
A quick and easy technique that looks so effective in the flesh.
"Sticks & stones"
"Release the Kraken!"

"Bugs"

"Use your wings

"Be fearless"

Here are two cards that I made using the new Skull 3D embossing folder from Sizzix.
The first one below is plain white card stock that has been embossed using a piece of black graphite paper against the card as it was run through with the embossing folder. It gives a great black-and-white effect for very little effort.


Sunday, August 14, 2022
LAYERED MASKING
Masking stamped images is a technique that has been around forever but it always gives such a great impact when used with lots of white space left on the background. For my examples, I have used both Distress Inks and Distress Oxide Inks and the overstamping in the black was Black Soot Archival Ink. Silhouette-style stamps, meaning more solid stamps, will always have the greatest impact on this type of technique. I have used masking paper which is tacky on the back, as well as sticky note paper that is also tacky all over the back. You can die-cut the sticky note paper if you put a piece of non-stick release paper on the back before running it through your die-cut machine. I keep the release papers from my A4 size adhesive magnet sheets and A4 size double-sided adhesive sheets to use for this type of method as well as keeping excess double-sided adhesive on it for later use.
"Lost in the woods"
"Troublesome ending"
(Who knew a zombie could end up on the
Serengeti? I was going to draw in a severed
arm but thought it best to leave it up to
the imagination.) 😏
"Unwaveringly"
(Yep, loved this one so much I had to do it twice!)

"Untried"

"Walk in nature"
