Showing posts with label Mica. Show all posts

Thursday, February 4, 2021

MICA FLAKES & SHEETS

I love the effect of Mica Sheets and Mica Flakes and the different looks you can create by using them in various ways.  The first two pics below are the cover of my Technique Book and the mica on that one is on the atc on the front cover where I've attached it on the top right and bottom left so it looks like a shattered window.  The mica flake generally comes in a whitish colour but can easily be coloured by putting a little into a snap-lock bag, add a few drops of alcohol ink in your chosen colour, smoosh it around and it is ready to use.  I attach mine with a clear-drying glue (Art Glitter Glue).  When I attach mica sheets over an image, I always use Glossy Accents as this dries crystal clear so you can't see it.  You can also attach the mica sheets with brads or staples!  I have also used a circle die with some mica sheet to create the circular shape on "tendril" below.
 
"Technique Book #25 cover"
(20cm x 15cm)

Close up of the atc on the front cover.

"Shiitake"
(Mica sheet over the words and coloured flake at 
the bottom of the mushrooms)


"Study Observe"
(clear mica flake on parts of branches
and on the grass at the bottom)

"Tendril"
(mica sheet, circle die-cut from centre and
attached with staples)


"Vulnerable"
(shaker card with mica flake trapped under acetate front)


"Dearly departed"
(coffin shape is also a shaker with mica sheet
over wording at the bottom right)

"Escape the ordinary"
(mica sheet glued down over image)


 "Collection"
(thin piece of torn mica stapled over the mushrooms)


Tuesday, July 7, 2020

MICA TECHNIQUES

Mica is a product that has been around forever.  I remember buying some nearly 20 years ago and I still have some of it left.  Since then I have used several different types of Mica, from donut shapes to different colours of Mica through to Mica flakes.  The Mica I have used for this class is absolutely clear in colour, transparent and also flexible so it doesn't shatter the same way that my other Mica does.  Consequently, I used alcohol inks to add colour to it so it would look different from say, a piece of acetate (because that's exactly what it feels like!).  However, because this is Mica, it is heat resistant and you can emboss on it.  I even tried using the Distress Glaze Embossing Powder on it and it works beautifully as it just changes the colour of the Mica but also gives a nice bumpy sort of texture.  There's no sample of that here amongst these ones, I was just trying out all sorts of things to see what would work and what wouldn't.  Love that I can staple or brad these pieces on too.  I even die-cut a piece (the heart on the 2nd ATC) though that took a bit of hand-cutting too.  It made me want to do another class using the other ordinary Mica, though there is nothing ordinary about any Mica!  Love it all.  

"Plastic melts"

"No refunds"

"Aquaholic"

"Evil"
(Yes, you can even stamp on it with Black
Archival Ink and heat set with a heat gun)

"dos"
(I've been waiting for ages to use
this quote 😉)

"Take the leap"
(The leaf shape in brown is the Mica coloured
and with some clear embossing on it)

Finally, these last two are samples from last week's class, Embossed Waxed Backgrounds.

"Zombies"

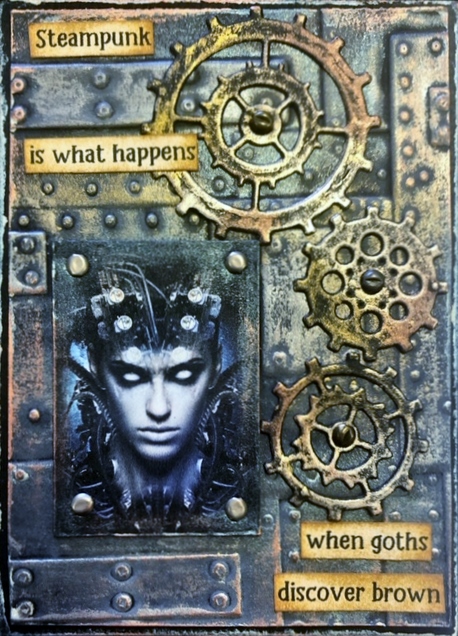
"Steampunk"

Saturday, April 4, 2009

Mica atc class

I've just finished the first of the 3 Mica atc classes, what a full-on day! We used 3 different types of Mica - the normal flat sheet Mica, Mica Glitter (available in lots of assorted colours) and the Mica Flake (also available in several colours). To adhere the Mica we used either Dimensional Magic, Glossy Accents or Diamond Glaze as they all dry crystal clear and have excellent glue properties.
Here is the raffle atc that was won by Rosemary.

"Stone Angel"... (this one has the Onyx Mica Glitter on the German Scrap Swan Wings)


"Temptation"... (also using the Onyx Mica Glitter on the wings....tempted??? lol)


"Mel-an-choly"... (I used the crystal coloured Mica Flake on this one...very ethereal looking!)

"Solitude"... (Mica Sheet used on this one AND there's that black texture paste again!)

"Home"... (also Mica Sheet on this one as well as a bit of shrink plastic with "home" on it and a verdigris coloured embossing powder around the edge)


I'm not as gabby today, think I'm all talked out from the class. I tend to do lots of explaining in the class as I want the girls to have plenty of information so they don't make mistakes as there working along. It's a lot to get through in 2 hours! Learn a brand new technique, often with new products that they haven't been exposed to before and make 3 atc's - 2 for the book they are making and 1 just as an atc to keep. I had 4 new girls in my class today which was nice, some newbies to get all excited and enthused about atc's....yahoo!!!

Friday, October 10, 2008

Bleach atc's, mica atc's, Technique book #1 revisited

Tomorrow I'm teaching Technique Book #1 for a second time and I thought I'd put the photo's in again seeing how I've discovered how to make sure they are "clickable". This ensures that if the girls don't get the book completed in the class they can put it together at home in front of the computer and they'll have pictures to show the order of the pages.

Front cover:

Sheer heaven:


Credit card technique:
Alcohol Inks:
Peeled Paper Technique:
Faux Leather Technique:
Contents Page:
Back Cover:


Last Saturday's atc class was a bleach technique. As I said in the last post, this was not to be the old way of stamping in bleach and then applying to the card stock, it was a different way of using bleach. I stamped in clear embossing ink on the card, then embossed with clear embossing powder and then painted in the stamped areas with bleach - neat bleach (not diluted), ordinary stuff from your laundry. It turned the black Bazzill card stock a beautiful brown colour which you could then add colour to (if you chose to) by using Twinkling H2O's or chalks. The H2O's were the best!!! Here is another sample from that class...."explore".


Tuesday night's class was mica....gotta love that stuff!!! I showed the girls the various types of mica that we have at Scraptivate - mica sheets in the packets, mica glitter (in about 20 colours!) and the natural pearl coloured mica flake. This one is called "contemplate" and uses a piece of mica sheet attached with 3 tiny screw brads. The image is a sheer heaven transfer on watercolour paper.

Another sheer heaven transfer with mica sheet over the faces - funny how it makes them seem more "clear"!


On a personal note, my oldest son has only 14 months left to serve of his 6 year term in the airforce - he lives in Newcastle which is on the other side of Australia so we don't get to see him more than once a year for a couple of weeks. He came home at short notice to attend the funeral of my Dad and it's been wonderful having Jarred and Elice (his girlfriend) home for a few weeks. He is an aircraft technician, basically he works on the Hornet's (F/A18's - the fast jets) and Newcastle is the base in Australia where they train the pilots so consequently, they have the only 2 seater jets in Australia! When he first signed up he put his name down for a flight and this finally happened just recently. A 45 minute flight in a fast jet is many a man's dream, he even got to fly the plane for a bit and loved every minute of the loops and dives they were doing, even pulling 7 G's! Wonder if the fishermen they buzzed on the beach enjoyed it as much?....lol. Cleverly, he took his camera so here's a couple of pics for posterity.


Monday, July 28, 2008

A Mixed Bag...including art!

This post is going to be a bit of a mixed bag, some more pics of our mega-holiday in Alaska, some arty pics, a TY for an award as well as plugging my most favourite blog of the moment. We'll start with the blog that I just can't live without...The Creative Junkie. The wonderful thing about Andrea and her lovely posts is she does it every couple of days...so you don't have to go too long without your eyes watering, pee running down your leg and your mouth hurting from being stretched in a grin from ear to ear! When I first stumbled across this particular blog I was laughing so much I just HAD to read everything she had previously posted and I'm so glad I did! The CHIA Pet incident is just classic....go on.....read it.

Okay, onto the rest of our day in Juneau. You might remember this was Mother's Day and we'd had a fantastic helicopter flight over glaciers (including a walk on a glacier!) in the morning. Next we went up to Mount Roberts via the Mount Roberts Tramway. The take-off point is actually on the dock and in the following photo's you can see how steeply it rises before landing at the top at the visitors centre and snow everywhere! The square shed structure you see on the dock next to our ship is where the tram takes off from....onward & upward...


The ship's getting smaller...

At the top taken from the visitor centre - what a view!!!


Here's Grant trying not to fall over in his oh-so-slippery leather soled shoes. Drat, I was hoping to make some money on funniest home video as I took about 3 video's of him doing these little walks in the snow. He didn't oblige.

After Mount Roberts we did a quick walk-around inside the Juneau Douglas Museum then started to head back towards the ship for a bite to eat but first, "let's have a quick drink"! We popped into a nice little Irish bar with the locals but unbeknown to Joan and myself, each drink was a double and we'd not eaten lunch and we WERE heading back to the ship for some food. So we had a couple of drinks, left the bar to get that food and we ran into Mike, one half of our dinner companion couple who sits with us each night at our table.

Joan & Kelsey...."Where ya goin Mike?"

Mike..."Off to get a drink"

Joan & Kelsey..."We know a GREAT place, we'll SHOW you!"

So it was that we ended up back in the bar for more double bourbons, still no food on board but the bar pretzels will soak up the booze....right??? WRONG!!!! No idea how much later it was that we staggered/giggled/guffawed our way up the street to the ship, Joan nearly taking home a souvenir Juneau fire hydrant that was almost embedded in her leg as she walked into it full tilt. The bruise lasted for days and turned all lovely shades of purple/green/yellow.

Here's a nice little doggie we saw while staggering up the street, poor bloke must've thought all Aussies are nit-wits the way we acted.

and here's Mike and Grant being best buds in full swing in the bar,

But first, WAIT, there's the Red Dog Saloon (which was full of tourists and was why we didn't go there for a drink), but it does have a shop attached where you can buy real Juneau souvenirs so we bought a couple of t-shirts, one a size XXL for God knows who, a couple of Red Dog Saloon condoms for our 2 son's as well as hubby's brother, and for hubby's brother's girlfriend - just what she always wanted - a Red Dog Saloon garter!!! Told you we were pissed, there would be no way we'd buy that crap if we weren't! lol

Finally made it back to the ship where we (Joan, Grant and I) visited my Mum in her cabin to say a boozy hello, which is also where Joan was staying (there is a reason I'm saying this). Grant had invited Mike back to our cabin for some more drinks (silly, silly, man) so off we go back to our cabin. Joan gets inside and sits on the bed while Grant is preparing more drinks. 10 minutes pass, she's still sitting there with her head in her hands...

Kelsey..."what's wrong Joan"....

Joan..."nuffin...I'm concentrating".

Kelsey..."Oh, okay.

Several attempts at conversation with Joan proceeded over the next couple of hours as she still hadn't left the side of the bed and her head was still in her hands.

Kelsey..."are you okay Joan?"

Joan...."I'm CONCENTRATING!!!!!!!!"

sigh.... The upshot was that after a few "visits" to our bathroom I had to phone Mum in her cabin and say "Sorry Mum, Joan can't come home tonight, the ship is spinning in a vortex and she won't get there". Joan stayed the night in our conjugal bed - I was in the middle in case you were wondering though I did wake several times in the night and as she was still in the same sleeping position I was a little concerned that lest I touch her, she may be stone cold!

The next day we visited Glacier Bay, the Hubberd Glacier to be exact, 6 miles wide and oh so beautiful. Worst weather of the trip, 35 foot seas and 50 knot winds and a MEGA HANGOVER added to a wonderfully listing ship. Certainly was a Mother's day to remember!

Onto some arty pics, kudo's to you if you've lasted this long!

I posted a pic of one of my mica atc's on another blog that was having a comp for "flourishes". I love flourishes so had no trouble adding them to an atc, here was my entry.

The image is a transparency trapped between 2 pieces of mica with flourish stamping, some embossed and a piece of cuttlebug scroll that was embossed also. Here is the link to the blog if you want to take a look at some other entries with flourishes.


I have a couple of pieces of artwork coming up in Cardmaking, Stamping & Papercraft using Rachel Greig's Darkroom Door stamps, the "Doors" set. Can't show the full pieces but here's a couple of glimpses of one of the cards, the other piece is a canvas.

That's it for now!