Showing posts with label art doll. Show all posts

Sunday, February 6, 2011

Metal Embossing Name Tags, Art Doll & CD Book Cover

My computer is finally fixed and after many hours re-installing programs I'm ready to go again. Somebody should shoot those stupid people who write viruses that lurk in the atmosphere just waiting to pounce on unsuspecting people like me!!! (Yes, I have a good anti-virus but unfortunately I'm not the only one to use my computer and I KNOW not to click on any of those little annoying pop-ups that promise faster computer speeds, only to infect you with something that you have to pay to have removed.)

So the first Metal Embossing Name Tag & ATC Class went really well on Saturday. Two more times to go - Tuesday night and Thursday morning and I'm sure those girls will love their little name badges as much as the others on Saturday did. One of the best things about my classes is how much pleasure I actually get from seeing the fantastic things the girls come up with when they stretch their creative wings....loved Robin's "Peacock" (an amazing aqua colour) Ten Second Studio Metal & Espresso alcohol inked, Tree embossed and owl charm name badge...awesome!

Here are the couple of name badges I made as samples.

Badge #1 (Cuttlebug Clockworks embossing folder and some watch pieces)...


Badge #2 (Cuttlebug Tiny Mosaic Texture, skeletons (from Scraptivate) and a fuse!)


ATC Sample...
"Serenity"... (Cuttlebug Moroccan Screen with Ginger & Pearl Alcohol Ink)


More of these ATC samples of this technique to come.


This particular technique is the second one in my ATC Technique Book Classes at Scraptivate, the first technique and book cover was the Stamping/Colouring on CD's. This is the cover of my book...

"Cover"...

Some close-ups...

"CD with Tattered Angels Glimmer Glaze in "Waterfall", stamped with Ophelia stamp (using Stazon)"...


"CD with alcohol inks (Rust & Stonewash & a little Denim)"...


"CD with a light coat of pale blue acrylic paint, wiped off in areas to reveal the holographic effect of the cd, with a bit of copper paint for contrast"...


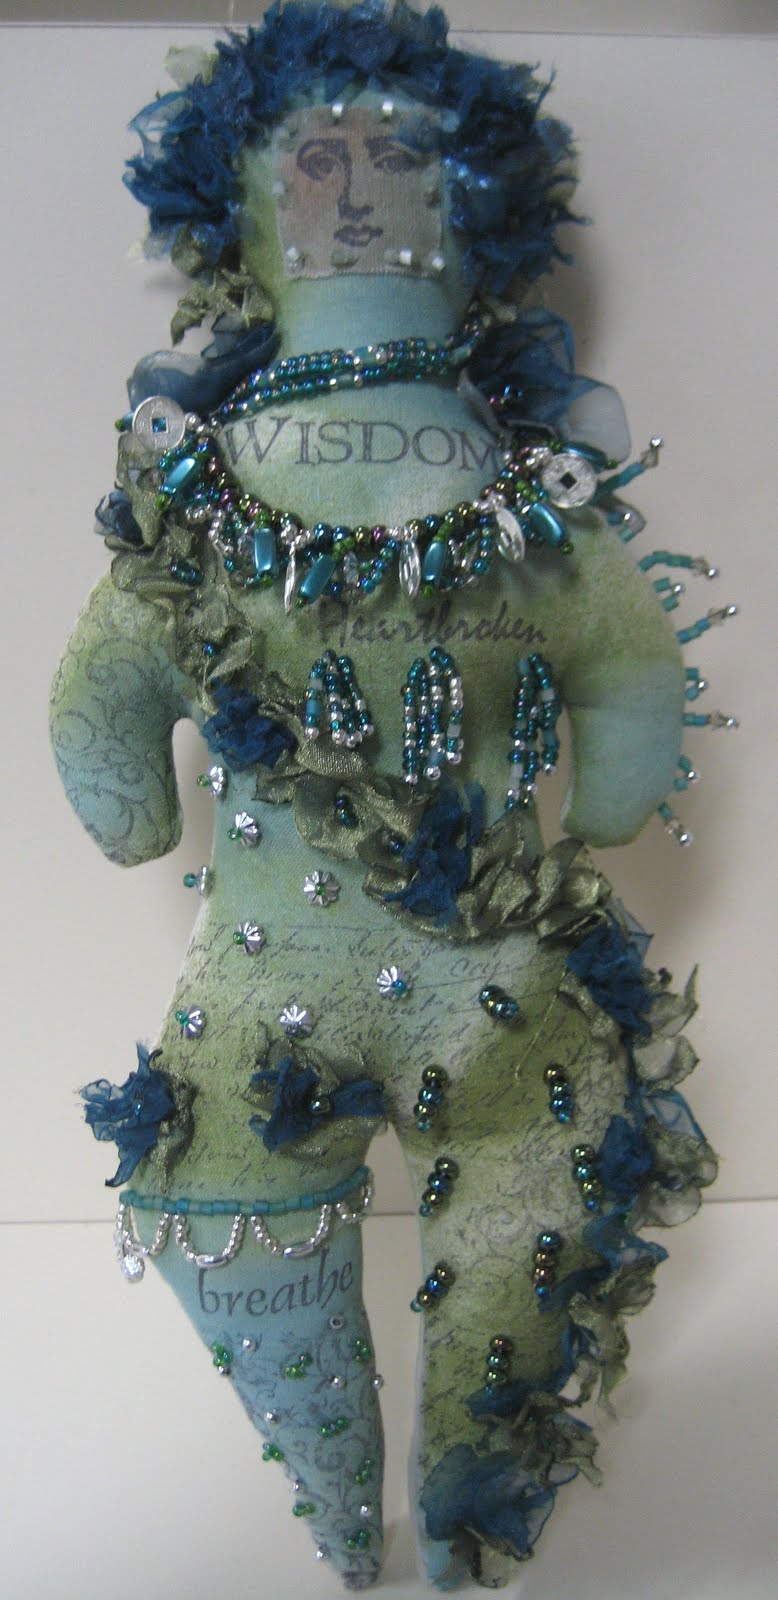
On another note, I'll be teaching my Art Doll Class again starting this Saturday, 3 classes of 2-1/2 hours each. The first time I taught this I made a full-size doll along with the girls in the class and I had already made a fully completed sample before that class. So the last time I taught it I thought my version would be a little smaller. Less beading to do that way and they still get to see what effect you can get with beading, stamping, colouring and burnt organza/tulle. I kind of like the little version, she's only around 6" in length (15cm) so I think I'll be doing that one again! Here's the smaller version...

A stamped face attached with beads...


I teach the girls a freestyle beading technique that can become VERY addictive! How many beads can YOU add to the one strand??? lol


This is the back view with the wings made from the burnt organza and tulle...


So there you have picture overload for a while, more of the Ten Second Studio Metal Embossing atc's to come. ;-)

Friday, September 3, 2010

Art Doll Class & Soot technique

Yay, I'm back online and it sure makes you realise how much you rely on the internet to keep you in touch with everyone! So I now have my art doll finished and the pics are ready to be shown......
I'm teaching this art doll at Scraptivate and I'll probably be repeating this class another couple of times - once during the day over 3 sessions and another weekend series of classes. This doll is made over 3 classes of 2-1/2 hours each. The girls will be doing everything from scratch, from tracing the pattern to freezer paper, ironing it to the fabric, stitching the body, turning, stamping, colouring then stuffing - all this on the first day! The 2nd class is beading and the third class is all about the organza decoration.


This is the back view of the "hair"...


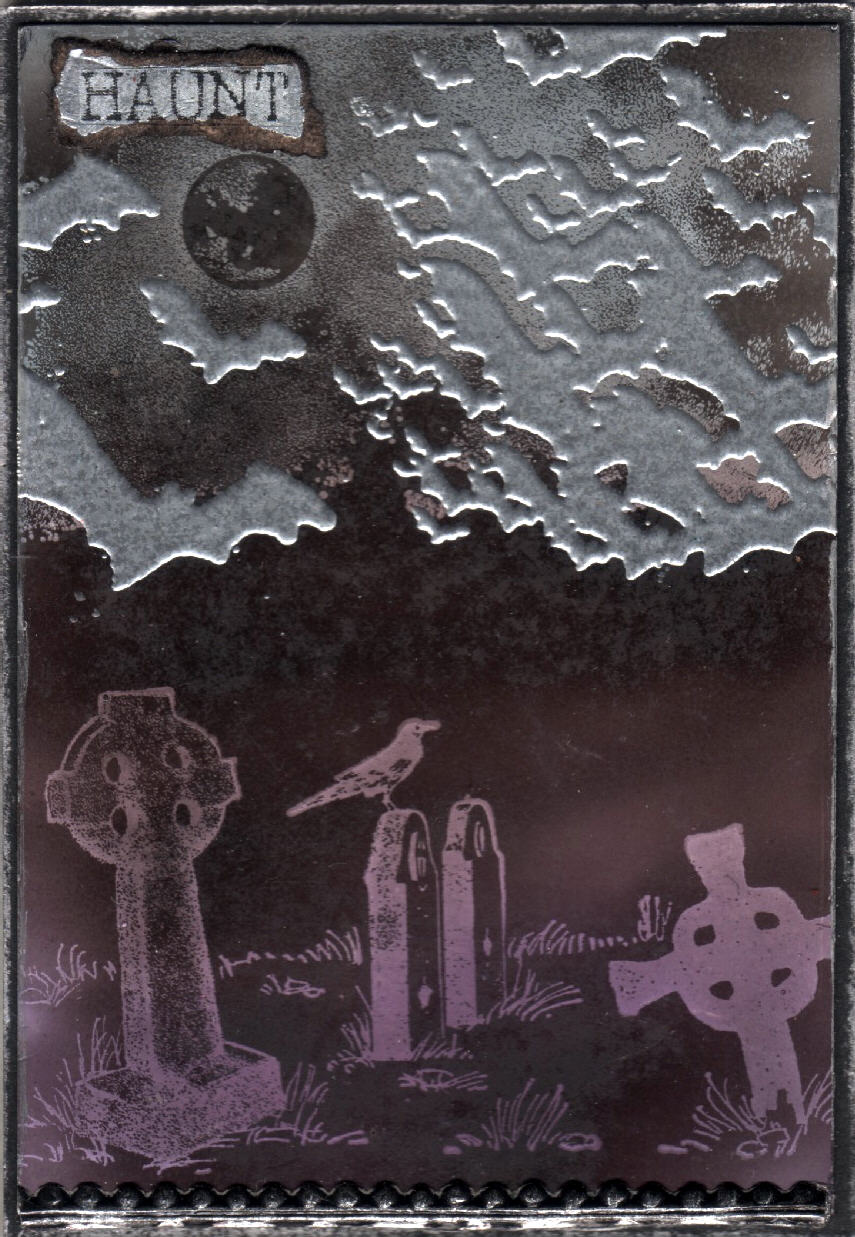
I'm also teaching the soot technique again tomorrow morning at the ATC Technique Book class. Another of those old techniques that have been around forever but is just simply spectacular and oh so simple!

"Haunt"...


"Gaze"...

"Blossom"...

"Fragile"...
Hope the girls bring a good dose of patience with them for the art doll class tomorrow as well as their sense of humour....which I shouldn't worry about as we usually have a pretty fine time with lots of frivolity and a little naughty humour. ;-)

Friday, August 20, 2010

Shrink Plastic Revisited & Faux Wax & a cake!!!

Addition.....scroll right down the bottom for a 5 minute microwave cake recipe.....

I'm revisiting Shrink Plastic for my class tomorrow. I have had a bit more of a play with it since I last taught this class back in early 2009 because I like to do something fresh for the girls who've done previous classes with me. It's also nice to introduce the newer girls who've not been amazed by some of the older products and techniques that have been around for a while.


For this first one I've combined 2 different new techniques that I haven't shown before....I coloured a piece of white shrink with one of the Tattered Angels Glimmer Chalks - of course it won't dry as shrink is a plastic surface but by the time you've heated it, all is good and it dries wonderfully. The second thing I did with this particular piece was no stamping beforehand, just spray with the glimmer chalk, shrink it down and then while it's still hot and soft, stamp into it with a stamp with black stazon. Gives a wonderful textural element as well as a soft matte finish.


"Post-script"...


"Enter"... (this is a terrible scan, it's because there's the shrink plastic door on top of foil tape on chipboard, on top of flyscreen, on top of the background....too much height for the scanner to cope with, sorry)


"Vision"...

"Doors"... (the stamped words are Stazon silver metallic ink on black shrink - you can actually read the wording irl but because of the silver ink, it's throwing the scan off)


...

....

.....

......

.......

WARNING!!!! Naked male backside coming up.....if you don't want to look, scroll and close your eyes....
...
....
.....

"Work in progress"...


Below are the last few Faux Wax atc's from the last class.

"Kiss"... (the background of this one is from the Metallic Cardstock class, technique described in the previous posting)


"Dance"... (the gold sparkles on the background is Jo Sonja Gold Dust. I've described this product before but this is the first photo where you can actually see it!)

"Bloom"...


Dreams"... (this background is from the upcoming Soot class)


"Weird Desire"... (another soot background)


I've also been working on my fabric art doll. This will run over 3 classes of 2-1/2 hours each at Scraptivate and the girls will be making it from scratch - from tracing the pattern, stitching (on a machine) around the body, turning, stamping, colouring, stuffing, beading and embellishing. It will certainly be an exercise in patience for them. The head alone has about 90 small burnt organza flowers on it....yes, FLOWERS (though they are shabby ones). I'm about half done with the embellishing and when it's complete I'll post pictures. The class is in 2 weeks time (4th September is the first class) and I may run it a second time if the numbers warrant it. This is certainly something out of the norm for most of these girls and I hope they enjoy it as much as I think they will.
I may even have one of these for a give-away on my blog....all things going to plan!
5 MINUTE CHOCOLATE MUG CAKE
4 tablespoons S R flour
4 tablespoons sugar
2 tablespoons cocoa
1 egg
3 tablespoons milk
3 tablespoons oil
3 tablespoons chocolate chips (optional)
A small splash of vanilla extract
1 large coffee mug (MicroSafe)
Add dry ingredients to mug, and mix well. Add the egg and mix thoroughly. Pour in the milk and oil and mix well. Add the chocolate chips (if using) and vanilla extract, and mix again. Put your mug in the microwave and cook for 3 minutes at 1000 watts. The cake will rise over the top of the mug, but don't be alarmed! Allow to cool a little, and tip out onto a plate if desired. EAT ! (this can serve 2 if you want to feel slightly more virtuous).

Saturday, July 17, 2010

Rinse Aid Resist Cover

Here's the pictures of the Rinse Aid Resist cover for ATC Technique Book #4, as well as a few more samples.

The cover page is 20cm x 15cm (8" x 6")...


A close-up of one of the small tiles which has been cuttlebugged for texture, painted black then rubbed with Silver rub'n'buff to bring out the texture, then a fuse wrapped with metallic thread around it.


"Sanctuary"...


"Remember"...


"Wife/husband"... (at the top of this atc is a piece of the new 10 Second Studio metal that we now stock at Scraptivate. It has been run through the cuttlebug and then sanded to reveal the silver - it started out as a beautiful mocha colour).


"Dream"... (this one also has some of the 10SS metal down the left hand side - same treatment as the one above - cuttlebugged then sanded back. The word "Dream" was stamped onto the right side of the metal, then I used a stylus to impress the word into the metal then sanded it back so the depth of the word keeps the aqua blue of the metal while the remainder is silver.)


The previous class was Mosaic Embossing and this was an atc that was made using that technique. I sometimes like to do a card as well to show the girls that they can take any of the techniques learnt in my class and apply it to whatever else they want to do. So below the atc is a card using the same image and the same technique.


"Ethereal"...

Card...


Tomorrow I'm planning on spending the day doing up my samples for the next class - Metallic Cardstock BUT I'm also going to make a start on the art doll for the class that I've been promising the girls I'd run. This art doll will be stitched, stamped, stuffed, beaded and generally embellished within an inch of it's life! I'll also be showing them how to make ~shudder~ "flowers" to add as embellishment - maybe hair??? Don't fear girls, they will be shabby, grungy flowers. Might make this first art doll up in vintage white/cream but there will definitely be a darker version as well.....have to have SOMEWHERE to put my little silver and black skulls that I bought! lol