I have used Yasutomo Mineral Paper before with alcohol inks so I was aware of this different substrate for alcohol inks. So when I saw a 2-pack of A5 sized, unlined Stone Paper for $7 in my local Kmart, I had an inkling of what it was. It works exactly the same as the mineral paper and is such a bargain, 80 sheets for $3.50 (2-pack for $7.00). These samples were created with Ranger alcohol ink as a wash of colour over the stone paper which has a much more matte finish to it than Yupo does. The key is lots of isopropyl alcohol to give the "wash" look, rather than the other usual methods of applying alcohol ink. Because these backgrounds are so subtle, they don't need much in the way of decorating as I wanted the backgrounds to be the star of the show.
Wednesday, June 21, 2023
ALCOHOL WASH ON STONE PAPER
Tuesday, June 6, 2023
NO LINE WATERCOLOUR
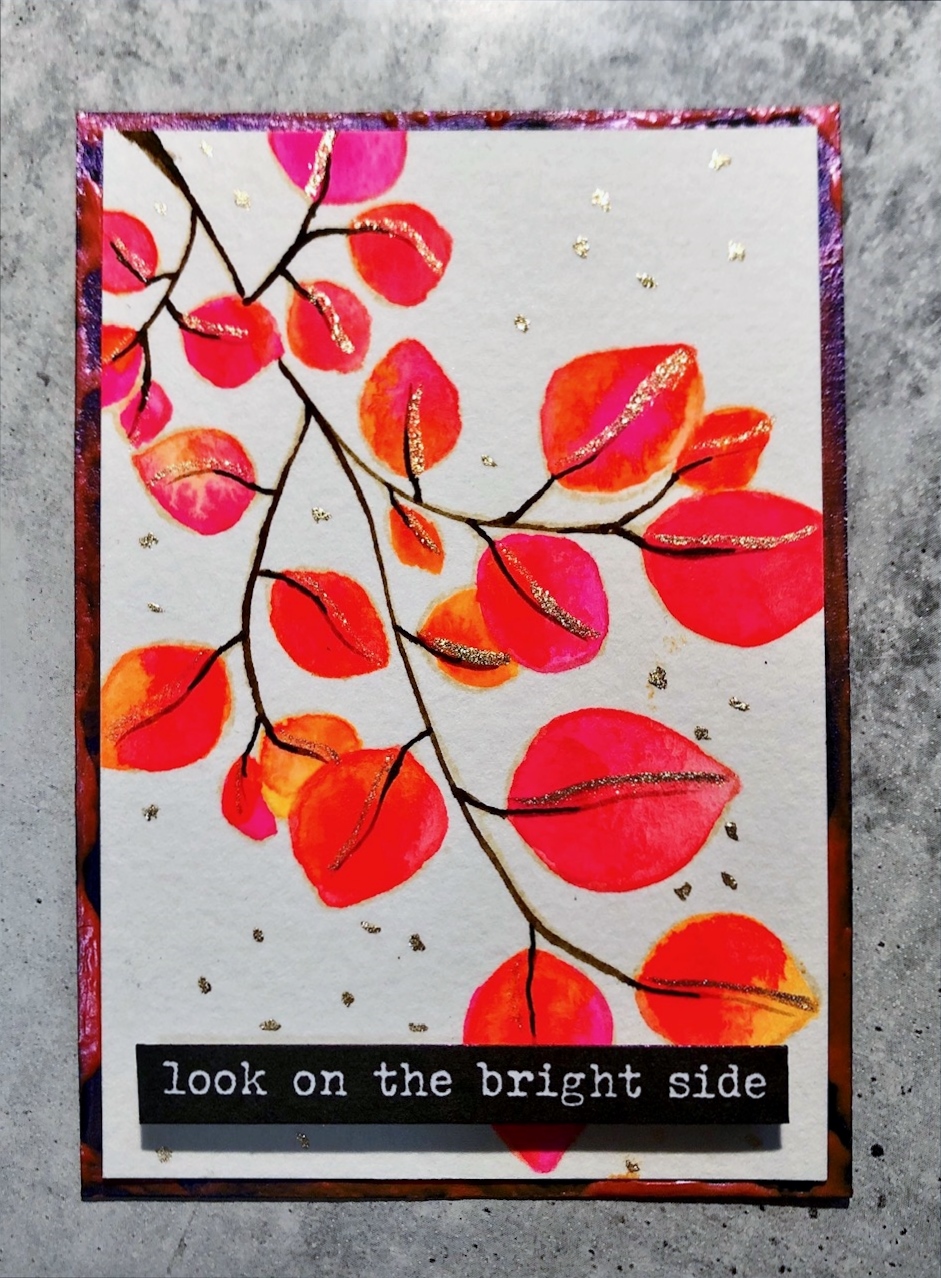
This is another old technique that has been around for years that I had yet to try. Antique Linen Distress Ink pad was my choice for the initial stamping as it seems to be light enough to not be as obvious as a darker black or grey outline like normal stamping. I don't know what it is about no line watercolouring but it just seems to take way longer to watercolour these images than it does a normal stamped image when you use a darker outline stamping colour. You can use whatever colouring medium you like and in my samples below I used Distress Ink pads, Paul Ruben fluorescent watercolours and my Daniel Smith watercolours, though I know that Gansai Tambi or any other watercolour will work equally as well. The only thing I wouldn't use as a colouring medium is metallic watercolours. They'd be ok as an accent or highlight but not as a complete colouring medium.
"Choose something fun"
"Beware of dog"
"Live gently"
"Bright side"
"This very moment"
Tuesday, May 23, 2023
GLASS BEAD GEL
I've had my tub of Golden Glass Bead Gel for many years and thought it was about time to have another play with it. It creates amazing texture on a background but it can also be used in a thin layer over an image to give a frosted effect. You can colour it with acrylic paint before applying it, or you can paint over it after it has dried. To keep the translucency, your paint should have no fillers in them or you will lose the shine from the glass beads as they are suspended in a gloss gel medium.
You can make your own glass bead gel as buying it pre-made is quite pricey. Simply mix gloss gel medium with a small size of glass beads and you have glass bead gel. The glass beads are the same ones used in line road-marking as when the headlights of vehicles hit them, they reflect the light back. So when you use glass bead gel on a silver or gold metallic background, they really stand out, as seen in my first sample below. That particular background was Ranger Foundry Wax in gold and silver smeared on a plain black piece of card but the addition of the glass bead gel on top takes it to another level entirely. This product is one that really needs to be seen in the flesh to appreciate it.
"In the dark"
"Live your story"
Close-up to show glass bead detail.
"The stranger within"
(The glass bead gel was coloured with paint
before applying it to the frame.)
"Wet spider"
"Fake smiling"
(You can see the frosted effect that
the glass beads give when used over
a whole image.)
"The dating pool"
Wednesday, May 10, 2023
ALCOHOL INKS ON GELLI PLATE
This is a technique I've been wanting to try for quite a while. The only thing putting me off was knowing that my Gelli plate was going to end up with a yellowish tinge to it as certain colours of alcohol inks end up staining the Gelli plate. It certainly doesn't affect the use of it in any way, it will only make the colours that you put down not seem quite right compared to using a normal white Gelli plate. But then I figured, why have a Gelli plate if I only want to keep it pristine (not a good thing in the Gelli plate world anyway!). So I went ahead and had a play with my Ranger alcohol inks, a couple of brayers and some acrylic paints. I used 2 brayers, one I kept for the alcohol inks and the other for the acrylic paint. I must say, to do some of the print pulls, I used my Iridescent Medium paint and it was spectacular! It just adds a little shimmer to the background without making it look too shiny like gold or silver acrylic paints do. I started out by just brayering some alcohol inks on, letting them dry, then using acrylic paint for the pull, and then decided to start to use some stencils as well for extra texture. I love how both of the styles of background turned out.
"Worthwhile"
Monday, April 24, 2023
BLACKOUT EMBOSSING

"Shine brightly"

"Remember to play"

"Just breathe"

"Live your story"

"Live this life"

I've included this picture of the first one shown at the top
as I didn't realise until after I took this photo that I had
missed colouring a couple of small areas in the middle.
Can you see them? It's so easy to miss. 😉

Tuesday, April 11, 2023
DOTTED WATERCOLOUR TISSUE
I love the effect of wrinkled tissue paper with any type of liquid colourant. For these samples, I used watercolours (Daniel Smith) but you could easily use Distress Re-inkers, Distress Sprays or any other type of liquid watercolour. The main thing is to not have anything too opaque as the translucency of the watercolours and the re-inkers and sprays I mentioned is that they are see-through enough for the little metallic dots that are already on this tissue paper to still show through in all their metallic glory. It's much easier to use a paintbrush to get the colours to move if they are already in a liquid state which is why I wouldn't use watercolour pencils, markers or anything that needs to be put on first and then activated with water as the tissue is still pretty delicate and you risk tearing it. Stick with a liquid to start with and it's easy to get wonderful backgrounds.
"What the flock?"

"AH! The element of surprise"
(I loved this little cat/bird die so much I had to
do one for my book and one as a raffle give-away.)
Wednesday, March 29, 2023
ANGELINA FRAMES, FLAMES & FLOWERS
I have a stash of Angelina Film (& Angelina Fibres) from my days as a cloth doll maker decades ago. It's wonderful stuff and creates amazing shapes, and changes colour, and you can burn holes in it when using a heat gun. For this class, I used a tea-light candle to melt and shape strips to make the flowers and smoke/flames. If you have some, dig it out and have a play. Don't put it directly in the flame though, aim it for the warm airflow directly above the flame, about 4 or so inches above the top of the flame. That'll be enough to heat it and distort it. It gets hot so maybe use tweezers to hold and shape the strips so you don't burn yourself. Ask me how I know! 🔥
Don't forget, to view larger images, click on the first one, scroll through. They are a much better size and you can see more detail.
"Toxique"
"I'm under your bed"