Friday, June 30, 2017

DISTRESS OXIDE INKS!

I've been a huge fan of the Ranger Distress Ink Pads for years now and was, like most people, excited when the news broke there was to be a new Distress Oxide Ink Pad.   They do react very differently than the normal Distress Ink Pads and are a total stand-alone product that is worth the outlay.  This is my opinion anyway, I know some people have been underwhelmed but I think like any new product you need to play with it several times to realise it's potential.... my biggest gripe at the moment.... only 12 colours available at the moment.   Another 12 are to be released very soon and Tim himself has confirmed they will release all the colours that are in the normal Distress Range.  There are loads of example video's on YouTube so check there for inspiration.

"Time flies"...

"Dark & Twisted"...

"Bee my honey"...

"Anti-social"...

These are some samples without anything on them.  They are 5" high 
x 3.5" wide (or 13cm high x 9cm)


Tuesday, June 13, 2017

TARNISHED FOIL

Probably one of the best purchases you can make in the papercraft/mixed media world is a roll of Silver adhesive foil tape.  Ranger sells the sheets (A4 I think) but I prefer the roll that you can buy and if you get the one that is about 8cm (or 3") wide, it will cover an atc easily with extra to wrap over the edges to keep it neat!  When you combine silver foil with embossing folders, embossing powders and black Stazon ink, the effect is just wonderful!  I like to attach my foil to some card stock first to give it a little body, then emboss with your favourite embossing folder then swipe over some clear embossing ink lightly in areas, emboss with powder (I used gold, copper and some colours that suited my chosen images) and heat.  Allow to cool and add another colour embossing powder to contrast against the first colour, then after cooling again, swipe over some Black Stazon ink from the ink pad and it will pick up the texture from the embossing powders as well as highlight the design from the embossing powder!  Great background for cards too!!!

"Freak"...

"Planet B"...

"Bee little"...

"Black as my soul"...

"Assemblage"...

This last one below is my remaining atc from the previous class, Embossed Blobs.

"Honest"...

Friday, June 2, 2017

EMBOSSED BLOBS

First class back from my month long holiday in New Zealand and we'll be working with embossing powders.  I love the fact that there are so many ways to use embossing powders and this is an easy way to add a substantial embellishment piece to your work without detracting from your focal image.  The samples below all have a free-form blog of embossing powder that is made by tipping powder onto a craft sheet and then heating.  I use my Ranger heat gun as it is particularly good at not blowing the powder everywhere but what also helps is if you place a small piece (about 10cm square) of baking paper over the embossing powder before you heat it.  

Another example of how embossing powders can be used is seen in the first example below, "Nature's Graffiti".   The dragonfly is a silver metal embellishment that has been heated and then embossing powder tipped on to it before heating again.  No need to use an embossing ink, the heat from the heat gun is sufficient to get the powder to start to melt and stick to the metal.  I've used black and have added a little gold and a little copper too!

"Nature's Graffiti"...

"Iridescence"...

"Proton"...

"Malevolent"...

Monday, April 17, 2017

FOILED AGAIN!

I have had a "thing" for foils.... the ones that go onto a sticky surface and then peel off to show shiny, gorgeous colours.  So we all know that it works semi-ok on the sticky embossing powder, works brilliantly on double-sided tape, works wonderfully on clear embossing powder images and then run through a laminator but this is another way to use it!  Get out your dies and your double-sided adhesive paper (also known as JAC paper), cut out your shapes, peel the protective backing off, stick it to a card, peel off the front protective piece, add your foil, rub well and lift off!  You'll have beautiful die-cut shapes that have been foiled!  Of course, you can use several colours to make a multi-coloured effect or a single colour.   If you've missed any bits, use a glue pen to add some more sticky and wait 5 or so minutes, foil again.  To appreciate how awesome this technique looks, you must try it for yourself, the computer screen does these atc's no justice at all.

I'll be taking a small hiatus, be back early June.  

"Nature's Graffiti"...

"Gardener wanted"...

"Bee my honey"...

"Glitter Whore"...

"Wildflowers"...

Thursday, April 6, 2017

GRANULATED WATERCOLOUR

I have done the technique before where you sprinkle either rock salt or plain table salt over wet watercolour where the salt soaks up some of the liquid to leave you with lighter areas where the salt was.  This is a variation on that theme but you mix table salt with water in a spritz bottle and spray onto the wet watercolour instead.  After reading several articles about properties of watercolours including the difference between student quality and artist quality, it became obvious that certain colours granulated more than others.  

This is another of those techniques that you need to just play with to see what works and what doesn't.  Even the ones that don't work as well as you'd like, you will still end up with a useable watercoloured background.  My ratio of mix was 1tspn salt to 6tspns of water, but you can certainly play around with those quantities to see what works for you.  Besides my atc samples below I have posted my unadorned samples so you can see the granulation better.  You can also buy granulating liquid for watercolours but I wanted to try the cheaper (and at hand!) alternative of salt and water spritz.  

"Black"...  
(this started out with a layer of gold first,
the added a layer of black over it before
spritzing with the salt spray.  The little
black & white skulls are nail art!)

"Edgy Chic"... 
(this is burgundy and black with gold over 
the top section and dripped down)

"Be quiet'...
(only one colour, pale blue)

This is the "edgy chic" before adding the rest.

Pink, Purple and Gold.

Purple and pale blue.

This is the "be quiet" pale blue before adding anything.
Love the striations and granulation in this one!

Blue, rust and a bit of black.

Blue and teal.

Olive and navy.

Green and black.

Tuesday, March 21, 2017

FOILED EMBOSSING

This technique combines two of my favourite things..... embossing and foil.  The added bonus is that you can go through all your gorgeous background papers to find something that looks wonderful with your coloured foils.  It is a technique where you have to be quick to get the foil onto the embossing while it's still hot.  I've found it best to stamp and emboss in black first, let it cool and then just reheat sections and quickly press the foil down, press down lightly and lift up.  You do need to be choosy about which stamps you use and the ones that have some open areas work better than those that are very busy.  I've photographed these with the light shining on them so you can see the shiny foil in certain areas.  

"Cats have staff"...

"Tell a story"...

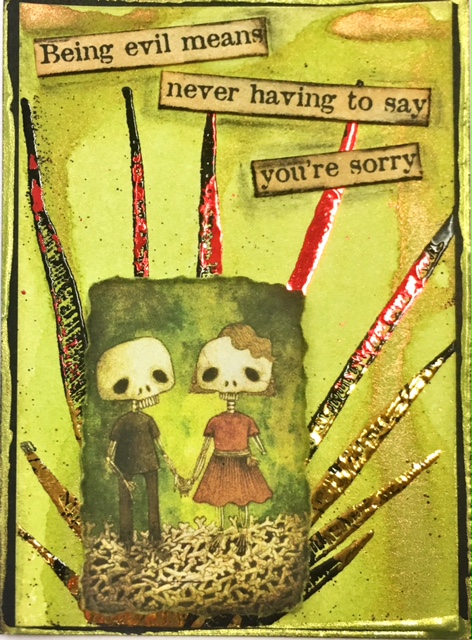
"Say you're sorry"...

"Another world"... 
(this one uses the gorgeous oil slick
coloured foil)

Tuesday, March 7, 2017

CREDIT CARD TECHNIQUE REVISITED

My absolute favourite background is credit card technique.  Over the years this has proven itself to be one of the easiest and most spectacular backgrounds that you can do with such simple supplies.... drawing paper (or cartridge or sketch paper), an old credit card, cheap acrylic paints and a water spritz bottle.  For the uninitiated, apply a thin line of one colour of acrylic paint across the top of an A4 piece of the drawing paper, immediately swipe it down the page with the credit card held at a 45 degree angle so you are scraping a very thin coat of paint onto the paper.  Wipe off excess paint, immediately do the same with a 2nd colour of acrylic paint applying another thin coat.  Then immediately spritz some water on all over the paper on top of the paint, making sure you have some big droplets not just a fine spray.  Count to 20-30 seconds, wipe again with the credit card removing the water and it will reveal beautiful backgrounds that are almost instantly dry as you've used a very thin layer of paint.  Experiment with colours and final top coats of metallics.  Just gorgeous!

"In the heart"...

"Plant a garden"...

"Malice in Wonderland"...

"Pixie Dust"...

Below are some of the samples of 
this background technique.


This atc below is the final one from last fortnight's alcohol ink smoosh class.  

"Dirt"...