Saturday, February 15, 2020

Glue & Mold Embellishments

I had forgotten how much fun it is to play with glue sticks and silicone molds.  BTW, mold is the British/Aussie spelling, mould is the US spelling.  I've used both.  😏
I have used both black glue sticks as well as the usual clear glue sticks in the molds.  Simply chop some of them up into pieces that will fit comfortably in your mold, then heat with a heat gun until it melts.  If your mold has small, detailed areas, you may need to do those little areas first, then drop in some bigger pieces on top.  I usually end up with some bubbling but I actually like the imperfection that you get this way.  The beauty of using the clear glue is you can paint it whatever base colour you want before you swipe over some metallic wax to pick up the raised areas to show these as a highlight.  Of course, you can also put a glue stick in your glue gun and fill a mold that way but I find it cools a little quickly before you get finished.  Try it either way, see which you prefer.  As long as you use flexible silicone molds, the heat gun won't worry the mold.  Even chocolate or soap molds will work!  Take care to let the glue shape sit for about 10 minutes to cool completely before you peel it out.  I have attached mine using a good quality double-sided tape.  Of course, smaller molds will set faster and the more detailed, the more difficult it is to do.  But I have been known to use a pin to drag the hot glue into areas where the glue hasn't gone before it sets.  Just take care, it's very hot and it will stick to your fingers and keep burning.
Final note:  If you paint your clear glue embellishments, you can't hurry along the drying process of the paint as you'll melt the glue embellishment.  I thought I'd be clever by adding a little embossing powder to the owl, well, that didn't work out the best as I lost some of the definition on the bottom of the feet.  No-one else knows, ok?  😉

"Forecast"
(That's a frozen Hans Solo small chocolate mold I bought on eBay!)

"Tomb"
(This tombstone is a Halloween chocolate mold)

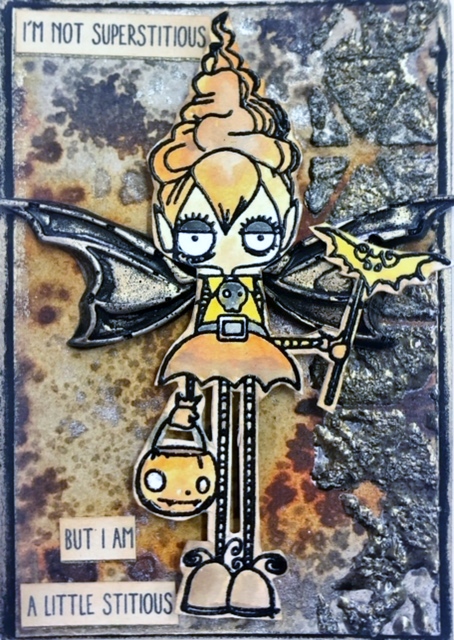
"Superstitious"
(Little bat wing molds)
"Results may vary"
(This mold is a silicone ice cube one)

"Looking for a sword"
(The owl is from a clay silicone mold set)

"Don't look back"
(A small butterfly mold.  Yes I know,
not my usual style.  🙄🙄)

Finally, another sample from last week's Gelli Plate & Distress
Oxide Ink class.
"Full of terrors"

Tuesday, February 4, 2020

C & S DISTRESS OXIDES & GELLI PLATE

We'll be breaking out the Gelli plates for this class.  Some of us are new to them so I wanted to do a clean and simple technique (hence the C & S description in the title) that is so easy to do, and not much clean-up.  We are using the Distress Oxide Ink Pads on the Gelli plate, no water, for a beautifully blended background.  You can then do whatever you want on it, stamp, add die-cuts, images, whatever you want.  Later in this book, we'll be visiting the Gelli plates again for some other techniques, this one will just get our feet wet with a quick intro to a great product.

"Strange Smell"

"Weed it and reap"

"Inhale"

"New beginning"

"Thought bubbles"

Wednesday, January 22, 2020

DISTRESS OXIDE SPRAYS #1

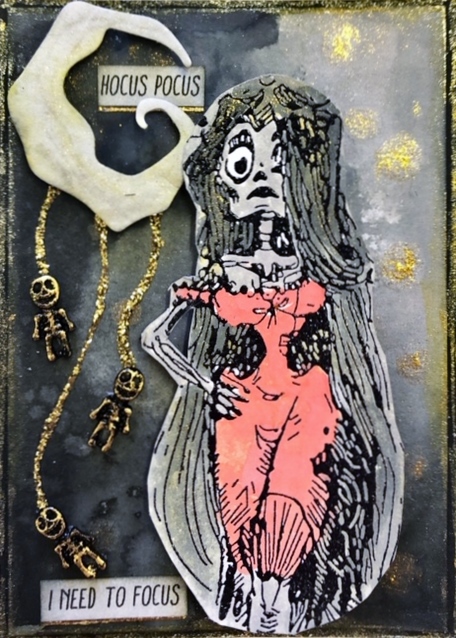
Our first class back for 2020 is Distress Oxide Sprays.  I have a collection of these sprays, not all of them, but about 70% of them, so I have a pretty good selection of colours to choose from.  I used these sprays, along with the Distress Spray Stains to create these backgrounds and also used the Oxide Sprays to colour the stamped images.  This was done by adding a little of the spray from the tube in the bottle to a piece of acetate and then picking up the colour with an Aqua Brush to messily colour the images.  Messy watercolouring stamped images is so much quicker and easier than precise colouring.  🙂
I used a piece of acetate to mask off the moon section before spraying, then spritzed lightly with water after the sprays had dried.  This causes the sprays to run a little and create the spooky moon effect.

"Already Disturbed"

"Bling out your dead"

"Fear not"

"Hocus Pocus"

 "Pitch Black" 

"Nightmare"

"Explore"
(This one has no moon on it, but I wanted to show the
girls the gorgeous Mercury Glass die-cuts and it does
have a Distress Oxide background)

This is my cover for book #23.  It is 20cm x 15cm (or 8" x 6" if you still work imperial rather than metric sizing).  

Tuesday, November 26, 2019

MATT & SHINE CHRISTMAS

Each year the final class of the year is always a Christmas theme.  This year I've created some backgrounds that have a matte finish, but with a bit of shine to them as well.  A couple of the samples are just Distress Oxide ink backgrounds as the colours just worked really well with the pics that I chose but the others are all the Matt & Shine backgrounds.  Luckily I get a great choice of creepy Christmas quotes and images to use along with my embellishments and backgrounds.  Have a Creepy Christmas and I'll be back in 2020.  🖤💝🖤

"Merry Creepmas"
(Matt & Shine background)

"Zombies"
(Distress Oxide background)

"Mediocre"
(Matt & Shine background, along
with some white ultra thick embossing
powder and some silver sparkles)

"Nice package"
(Matt & Shine background.   Sorry,
couldn't help myself.  Actually, not
sorry at all.)

"Deck the halls"
(Matt & Shine background)

"Santa Claws"
(Distress Oxide background)

Sunday, November 10, 2019

TEXTURED ALCOHOL INK

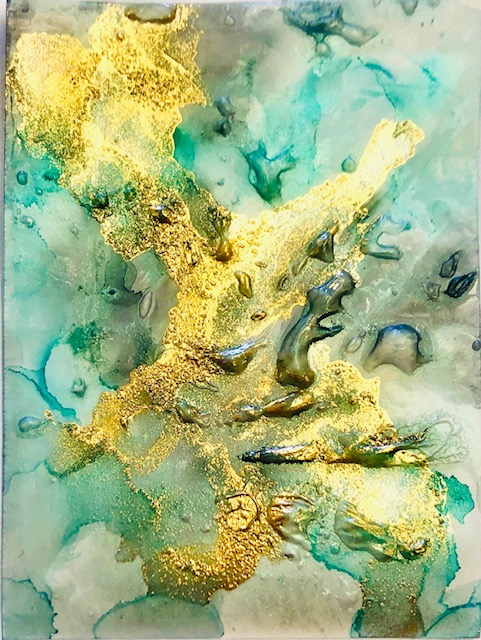
Alcohol ink is normally used on a smooth background but it can look amazing when used on a textured background as the ink will run along with any barriers that it meets and can pool in unexpected ways.  The addition of Pinata metallics adds another level of interest.  These samples are all created on gloss card stock and the texture is plain old white Elmers glue that has been heated to cause it to puff up, pop and ooze.  Take care not to burn the card.

"Shopping"
(The metal heartbeat embellishment is normally
silver, but has been made a gold colour by using 
the Pinata Brass over it, as it will stick to metal.)

"Fear"

"Volume"

"Melody"

"Sleep"

Below are some sample pieces before any addition
of pictures/embellishments so you can see
the texture.


Tuesday, October 29, 2019

ECLIPSE TECHNIQUE

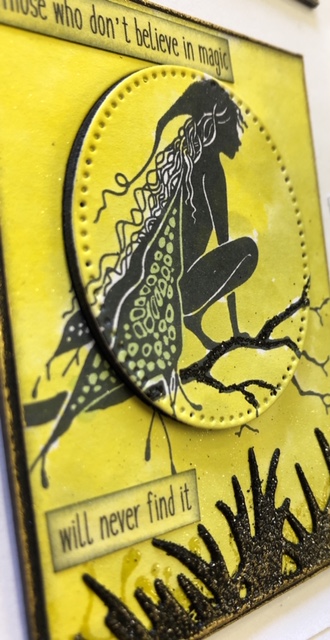
I've been wanting to do the Eclipse Technique for quite a while.  I just had to wait for the supply of skinny 3mm wide black and white foam strips and the little tiny black square foam pieces before tackling it.  As ATC's are so small, you have to be very selective about what type of die you can use on it.  The usual way of doing Eclipse has been to do a name using large letters across a card.  So the little die-cut letters on the first sample are only 3cm high and just fit on the ATC.  You can use either black craft foam under your die-cut shapes or alternatively, as I have in some of my samples, use the skinny foam strips and squares to raise the die-cut shape up.  The important thing to remember is you are cutting your die shape from your existing background, then placing it back into the same space, but raising it.  You also need to make sure that you keep any little bits that come out (like the triangle in the letter "A" and the oval shape from the "U" as you need to replace them to give the background continuity).  The shape can be as simple as the oval shape in the 2nd example, "Magic", which is the oval shape cut from a stamped image on the background.  Or a more intricate example like the gravestones in "Wicked" below.

"Far Out"

"Far Out" side view

"Magic"

"Magic" side view

"Neverland"
(The fairy is stamped onto the jar die shape
before putting it together)

"Time Flies"
(Same jar as before but this time it has
some flies in it)

"Wicked"
(Vellum ghost placed over raised
gravestones... a bit fiddly this one and
to make the gravestones stand out,
I've drawn around the edges with a 
fine black marker.  Unfortunately
you can't see the dimension, but it's
there, trust me!)

 "Hot Mess"

This final example is not an Eclipse one but I wanted to post it for the moon shape.  I was trying to find a good moon die-cut and they are all just circles or crescent shapes.  I wanted some texture to it.  So I cut a circle from white card, spritzed with Perfect Pearls spray to give it a little shimmer, dried it, then ran it through the 3-D embossing folder called "Bubbles".  This created some craters in the moon.  I then added a little shading with Hickory Smoke Distress Oxide Ink on a sponge and raised it with foam tape.  Perfect moon!

Tuesday, October 15, 2019

DIE-CUT FINISHES

Die-cut shapes and images are always a great way to add either a focal point or embellishing an ATC or card.  These are just some of the ways I have used to add a finish to these samples.
  
"People"...
1.  UTEE (Ultra Thick Embossing Enamel) is a chunky embossing powder that you can use 
to just coat the die-cut, or you can also stamp into it while still hot to create texture.  The
background is Paper Mill alcohol ink on photo paper.

"Forecast"...
2.  Cut your shapes from black card, then rub over metallic wax or 
metallic paint over sections of the die-cut shape to add interest. The
background is metallic paint smoosh technique.

"In memory"...
3.  A simple die cut from plain black cardstock and left as is.  
It highlights a brighter background beautifully.  The background
is from the last class, Shimmer Pens 2 and is made using the
Nuvo Glitter Markers.

"Lose hope"...
4.  Die-cut a background die and then colour with Black Spectrum Noir shimmer pen 
which adds a subtle sparkle finish.  I also added silver to the star shapes on the die-cut with 
a Nuvo Silver Glitter Marker which was then coated with Glossy Accents.  Silver and 
Grey sequin stars were also added to the galaxy style background to continue the theme.

"Soul"...
5.  Another black die-cut background over the top of a Distress Oxide 
background piece.  I rubbed Treasure Gold metallic wax on the black of the
die-cut to give it some highlights and a subtle change of colour.  

"Beauty"...
6.  Another background die that was cut from plain black card, then coated
with 2 coats of UTEE black embossing powder.  This gives a wonderful
deep, glossy, black finish to the die-cut.  I have attached it using the
Tim Holtz Tiny Attacher with the staples coloured in first with a
black permanent marker.  This is a trick I use frequently, colouring
in a row of staples to co-ordinate with the ATC I am using them on.
The background is Nuvo Shimmer Powder in the colour, Catherine Wheel.