The technique for this fortnight is one that utilises chipboard pieces, coloured embossing powder, clear utee powder (Ultra Thick Embossing Enamel is what UTEE stands for) and Perfect Pearls. Seeing how I got the girls on a bit of a Perfect Pearls kick, figured we could continue with those little pots of coloured powder and use them to make Marbled Embossing on chipboard. I mucked around in my studio trying to work out the best way to do this without the perfect pearls blowing all over the place. For this technique you're going to need a low blow heat gun. The normal Wagner or Milwaukee black heat gun I prefer for embossing isn't going to cut it this time! So it's the Ranger Heat Embossing Tool that's the best one for this particular technique. The layers consist of blackening your chipboard with either permanent marker or black soot Distress Stain, dry, press into clear embossing ink pad, emboss with chosen colour of embossing powder, heat, cool, clear embossing ink pad again, clear utee, a little perfect pearl of chosen colour sprinkled on, then heated. The perfect pearls melts along with the clear utee to make gorgeous marble like effects.
Lots of steps I know but the results are just gorgeous in the flesh. Once again the computer screen lets the side down with the average images, but some idea of how it looks is better than no idea! :-)
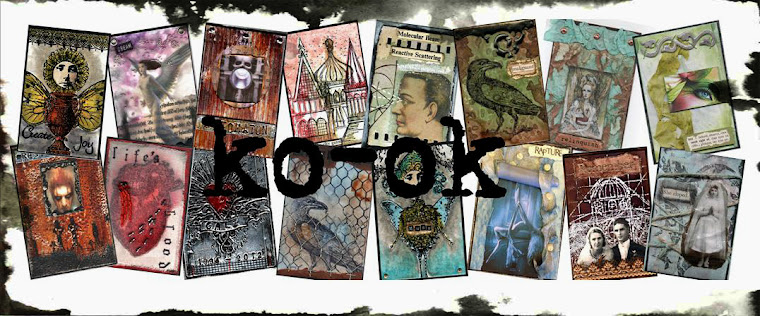
"Flighty".,. (Background is the Plastic
Parchment Background and the
embossing is done on the rectangular
chipboard frame.)
"King"... (Firstly let me say this in no way
reflects my thoughts on my husband,
he's more like the King of Good Husbands!
Background on this one is the
Canvas Resist Technique and the embossed
pieces are the 3 crowns at the top.)
"Sister"... (Background is the
watercolour drip from
the last book, the heart is
the embossed piece.)
"Nature concentrated"... (This background
is from the Foil Class and the bird
is the embossed piece. You can
clearly see the perfect pearls in
Gold & Mint in this piece.)
"Obsessed"... (Background is just a distressed
background using green & copper paints and the
square with the word on it is the embossed piece.
Sort of hard to see here as I also used some Copper Liquid
Pearls to blend the word in a bit, but this one is
a green background with copper Perfect Pearls.)
This one is from the previous technique that we did,
Wax Paper Fresco
(Solemnly swear)...