Wednesday, November 28, 2007

More Colourwash,Resin Fresco & Beading too!

I spent today playing in my studio after waking at 4am and then laying there for a couple of hours going through some ideas in my head. Actually, the dog woke me.....old age being what it is she can't hold her "water" all night....something I don't have a problem with fortunately!

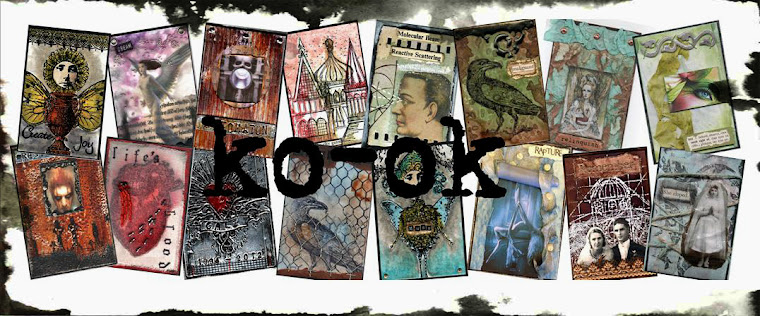
So this is the raffle atc for Saturday's atc class which is the Colourwash Technique.


I have another couple that I'm working on for Saturday and will post them later in the week. The bird, branch and hand holding the egg is from Michelle Ward's range of stamps, though they are from one of her clear sheets which, from memory, is sold through Stampington. The background chicken wire is a Lost Coast atc background stamp.


Next up is the raffle atc for next Tuesday night's atc class, Resin Fresco Technique using UTEE (ultra-thick embossing enamel for the uninitiated), gesso and paint. Love the lumpy bumpy texture that this creates! The brown colour down the sides is actually bronze paint (Golden's), don't you hate how the computer just flattens anything that is shiny or metallic!!! I've used Helmar 2 part crackle on the image in the centre.


This is another sample for that same class.....love this turquoise colour! Yep, used Michelle's large gothic script stamp for the background here, it's from her Printed Matter plate at Green Pepper Press. A girl can NEVER have enough gothic script stamps in my opinion or enough German Scrap available at Scraptivate (I used the white Baroque German Scrap and painted it with Aquarmarine FolkArt Metallic Paint).


This is an atc I sent over to Ruth, a girl on a yahoo group I belong to as a RAK....which I hardly ever do any more as my atc's these days are either made as samples or raffles. It's the tissue paper background from the last Saturday atc class. More German Scrap and some gorgeous Ranger Antiquities embossing powder in Rust.


Now for a throw-back to a previous hobby.....beading! I used to love spending hours doing beading, it's so therapeutic...you don't realise how long you spend absorbed in the little tiny beads, co-ordinating colours and creating whatever shapes you like. This is a beaded brooch that I made using the most glorious golds and browns. I'm a fan of free-style beading, no such thing as a mistake as you just go where you want with it. It's more more forgiving than some of the more structured styles, though I have done that as well and do enjoy it, free-style is still my favourite!

Wednesday, November 21, 2007

Colourwash Background Technique & help!!!

First off, I have a favour to ask, if any of you know the company that makes the stamp on this first atc, please let me know. Even better, if you have one and you want to sell it, let me know that too! I have a girl in my atc class who is desperate to own it....she'll probably sell you (or at least loan) her first-born she is that enamoured by it! It's a wood mounted one, it's called "Girl with a purse" but it doesn't have a company on the wood so I couldn't tell her where I got it from!

The background on it is the next technique that's coming up in about 9 days time - Colourwash Background Technique. Not saying too much more about it at the moment as you know my girls....they like to practice BEFORE the class and that is simply not allowed! lol I have stamped the image onto gloss and coloured it with Twinkling H2O's before cutting out and attaching to the background. Yeah....I know.....kinda bright for me but as I've said before, I'm a Gemini so I'm allowed to be changeable!


Next one is the same technique....


Now for another Tissue Paper background one from last Saturday's atc class, love the colours in this one!

Last one...this is the raffle atc from Tuesday's class - Canvas Paper Rinse Aid Resist.

Comments are always welcome, even from my friends who I see!!!! hint...hint...hint....lol

Saturday, November 17, 2007

more Tissue Paper Background

Here is another of the Tissue Paper Background atc's for today's atc class, black tissue paper again with silver embossing powder. It has more embossing powder on it as I pushed the black tissue paper down too flat, not really incorrect, just more embossing powder on it than I wanted so the next one I did I pressed the tissue paper down more softly. That picture is in the previous post below. Thanks must go to the awesome Michelle Ward for sending me the HIM stamp in a previous package I received from her! I stamped it with white Stazon onto transparency and cut a section out of the tissue paper and stuck the transparency behind so you could see the plain black background of the black mat board my atc's are always mounted on. The heart is stamped onto white shrink plastic, then shrunk and attached, Ruby Treasure Jewels are rubbed around the edge to give the crimson (blood!) colour.


I decided instead of doing more tissue paper atc's, I should be finishing off my 27 atc's for a technique book swap that's due next week. There are 27 of us are taking part in this, so we'll all end up with a fantastic book of atc's, each showcasing a wonderful technique with instructions listed at the back of the book.

I had taken part in another technique book through Stampgropers (a local Western Australian stamp group) and absolutely loved it! This particular technique book lives at Scraptivate where I work and every customer who looks at it just falls in love with it......AND wants to know when I'm teaching the class so they can make their own! Well, if you have a spare couple of MONTHS!!! lol

Anyway....back to the 27 technique atc's.....I did finish them off, they just needed a word on them. I coloured a piece of chipboard with a brown sharpie and then punched the letters with a metal alphabet punch into the chipboard. Then rubbed Classic Gold Treasure Gold lightly over the top followed by Silver Treasure Gold to give it a metallic look. My technique is Gel Medium Transfer, using Golden Soft Gel (matte) onto book pages.

Thursday, November 15, 2007

Tissue Paper Background Technique

Tissue paper background has been around for a while....it has various permutations but these are the ones I'll be showing the girls on Saturday at the next atc class. We'll be using black tissue paper, dress-making tissue paper and plain ol' white tissue paper. Three different ways of attaching it too.... Xyron 250, glue-stick and jac paper. The idea behind having a great background is to show it off...so don't cover it all up too much, you still want to see what all the effort was for!

First up, "Certified", this is dress-making tissue with the oh so fabulous colour, Quinacridone Nickel Azo Gold (Golden Paints of course).


Next up is "Ray". This is black tissue paper with Gold embossing powder. The sun up the top is a piece of mat board that has had 4 layers of Gold embossing powder melted onto it, one layer after the other, before adding the final layer, ink up a stamp with embossing ink and quickly before the final layer of embossing cools, stamp into it to get a great embossed image!


Okay, this next one had me stumped for a while, I used a combination of a yellow and a yellow/green paint onto plain white tissue and realised this is just SO not my colour combo!!! So I had to add some interference green and some Jenkins Green to darken it slightly before I was happy with it. I've used the scratches stamp from Stampers Anonymous (a Tim Holtz one....great stamp!) and embossed this with Patina Gold embossing powder...a gorgeous combination of black and gold embossing powders mixed together for a great antique look. Go ahead! Try mixing your own embossing powders to get some fantastic combinations like this one! I used this same embossing powder on the remaining exposed double sided tape above the words that I attached to a piece of chipboard. Does that make sense?


I do have another one finished and another one almost finished, so I will endeavour to post pics tomorrow.

Oh, almost forgot! In the last post I made a cryptic note about what I used to colour some of the shrink plastic, it looked like this ********! Give up? None of the girls in the atc class guessed what I used....though they should have, I use these ALL the time! SHARPIES!!! Scribble some sharpies on to the shrink plastic, coloured ones of course, you don't have to completely cover it as too much will make it too dark. Then take some blending solution (Ranger - from the alcohol ink line) on your felt pad and blend it like you would alcohol inks.....FABULOUS colour!!! Stamp, then shrink and if you want, coat with Dimensional Magic, Papier Glass or Diamond Glaze - all are a similar type of dimensional coating.

Friday, November 2, 2007

More shrink plastic atc's & Tim's crackle paint!

Below are more of my shrink plastic atc's....


First up is the raffle one for the girls tomorrow at the atc class - canvas paper background (rinse-aid resist), plus one of Julie van Oosten's new houses (available here) - this I've coated with Ranger Spiced Marmalade Distress Ink then the Rust Antiquities embossing powder....gorgeous rusty colour and quite matte too...not shiny at all! The shrink plastic is white, coloured with alcohol inks (less is definitely more!) and then stamped with Timber Brown Stazon.
The reason I said earlier about going easy on the alcohol inks on shrink plastic is shown below! This atc is another ERROR ALERT!!! ERROR ALERT!!! If you use too much alcohol ink then the piece of shrink plastic is really, really, REALLY, dark when it shrinks down. I loved the colours in this piece with the words on it though, so I decided to cut a little window in the back of the mat board. So if you are looking at the atc in the palm of your hand you can see it fine, it just looks quite muted. But when you hold it up to the light...oh my!!!! Stained glass effects galore!!! I used the ruff'n'ready (pre-sanded) shrink plastic for this top piece with the word stamp and alcohol inked the back of it, then stamped in Timber Brown Stazon on the front. The bottom picture is another ink-jet printed image on shrink plastic. Yep, did a whole page of images!


Okay, we just got the new Ranger Crackle Paint in at Scraptivate and I decided to try out the Antique Linen on some chipboard. Can you say G O R G E O U S or what!!! I'm definitely going to be trying out the other colours, so simple to use, slap it on, walk away and come back amazed! I used Walnut Stain Distress Ink to further enhance the cracks. This piece also has an ink-jet printed shrink plastic picture (surprised???). We also have just got in store the Ranger Stickles, these have been around for a while and I've had Diamond (which I love) but I bought the Platinum and smeared it over the shrunk picture before doing a coat of Dimensional Magic. Turned out quite nicely. I'm happy with it anyway. A little more "glitzy" than I usually do but I AM a Gemini so I'm allowed to be change-able.


So the door bell rings at 8am this morning, a parcel is waiting. OH MY GOD!!!! The fabulous Belinda Schneider sent me some awesome stuff!!! A magazine with the very delectable Ville Valo (lead singer of HIM) on the cover - article inside. A whole book of that wonderful Germanic Script that I sooooo love (now I can stop photocopying the 6 pages I have!!! lol). Also, ta-da!!!!! I now OWN one of Belinda's amazing Gothic Icicle Dolls with the very cool bat stitched to her back.....I coveted these as soon as I saw them here.....might sleep with it tonight! Also included was a gift wrapping sheet with more script and Gothic-type pictures. Talk about spoilt!


Thank you Belinda....you're a......DOLL! ~groan~